Last updated: July 11, 2026
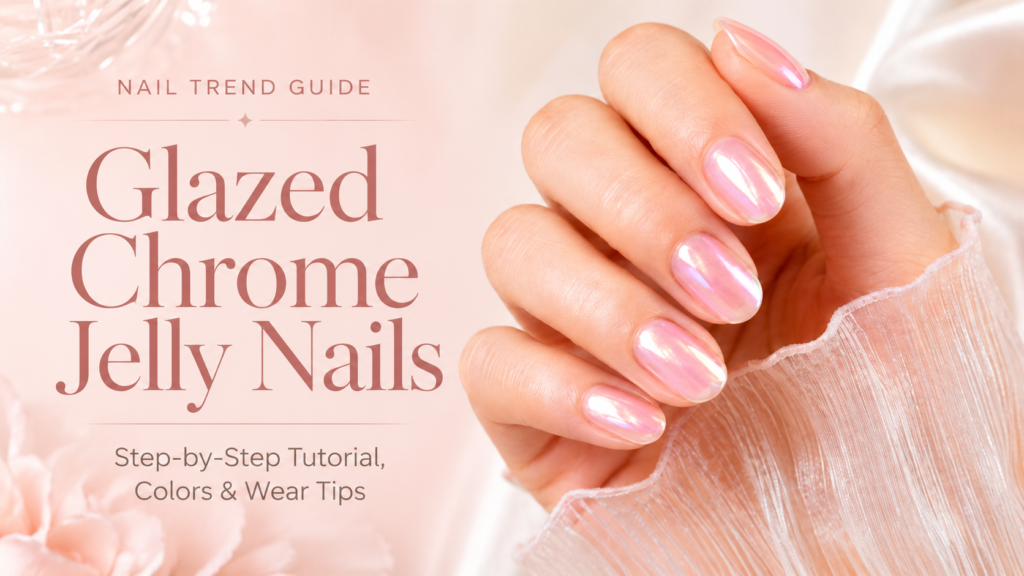
Glazed chrome jelly nails are a sheer, translucent jelly gel manicure finished with a light iridescent chrome veil instead of a heavy mirror chrome. The jelly base provides a translucent, candy-glass color, and the soft pearl chrome adds a subtle, angle-shifting glow over it. The finish is well suited to short natural nails, and applied as a gel service with correct sealing it typically wears for around two to three weeks.
Glazed chrome jelly nails combine two techniques that have been developing separately for several seasons: translucent jelly color and soft pearl chrome. The result is lighter than mirror chrome and more dimensional than a standard jelly manicure — a combination that is increasingly common in summer nail inspiration.
It’s worth being clear about what this trend actually is, because the name gets applied loosely online. This is a layering technique, and the final result depends on a handful of decisions many tutorials never explain. This guide covers what the look is, how it differs from the sheer trends it gets confused with, the products you need, a step-by-step gel process, and the failure points that shorten its wear.
| Definition | Sheer jelly gel base layered with a light aurora or pearl chrome veil, sealed under a glossy top coat |
|---|---|
| Finish | Translucent, candy-glass color with an angle-shifting pearlescent glow |
| Application method | UV/LED gel system; chrome applied per the top coat manufacturer’s chrome instructions |
| Recommended products | Sheer jelly gel polish + sheer aurora/pearl/”unicorn” chrome powder (not metallic mirror pigment) |
| Typical wear range | Around 2–3 weeks as a gel service; varies with nail type and daily hand use |
| Best suited shapes | Short almond, short square and natural oval; the sheer base keeps regrowth subtle |
| Main failure points | Incompatible chrome/top coat pairing, unsealed free edge, flexible nail structure under a rigid gel system |
What Are Glazed Chrome Jelly Nails?
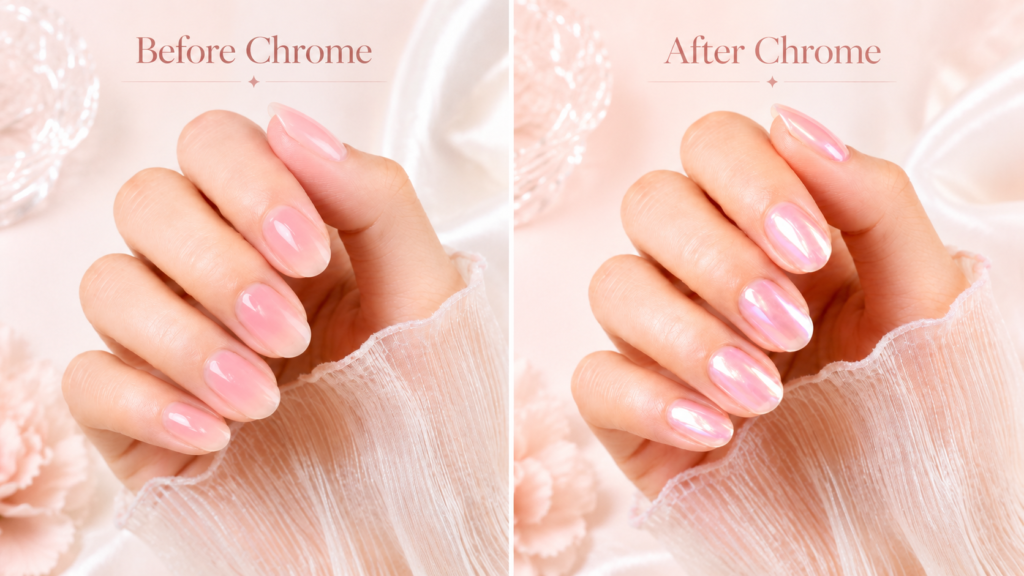
The term combines three elements: jelly color, a glazed finish, and chrome powder.
Jelly nails are the foundation. A jelly gel is a sheer, semi-translucent formula that lets the natural nail show through, creating a color with depth instead of a flat opaque surface — light passes through the color rather than bouncing off it, similar to the finish of a hard candy or a tinted gloss. The style has roots in South Korea’s gel scene, where syrupy formulas are layered thin coat by thin coat to build a controlled wash of color.
Glazed refers to the chrome layer — though not the mirror chrome most people picture. This is the descendant of the glazed donut manicure: an ultra-fine pearl or aurora powder applied over the top coat so it reads as a soft, luminous veil rather than a metallic coating.
Chrome jelly is the combination. Because the base is translucent, the shimmer appears to sit inside the color rather than on top of it. The intensity shifts with viewing angle and with how thickly the jelly layer was built — which is also why glazed jelly manicures tend to read better on video than in still photos.
Who is this look best for? Anyone who wants more than a nude nail but isn’t drawn to 3D charms or full mirror chrome. It’s office-appropriate, grows out gracefully thanks to the sheer base, and it’s a comfortable entry point for first-time gel clients.
Why Jelly Chrome Nails Took Off
The first jelly wave years ago was dominated by Y2K neons. The current version went soft — sheer coral, butter peach, translucent cherry, sea-glass blue, milky rose — while chrome evolved away from heavy mirror finishes toward lighter aurora and pearl veils. Those two lines converged, and the combination now appears frequently across summer nail inspiration, salon social feeds, and beauty trend coverage.
There’s also a practical driver, and it may be the real engine of the trend: a sheer base keeps regrowth far less visible than opaque color. The regrowth line becomes much more noticeable on opaque color after about two weeks, while on a jelly base it stays subtle at the cuticle — a concrete benefit for anyone stretching appointments to three or four weeks.
Jelly vs Syrup vs Lip Gloss vs Glazed Donut: What’s the Difference?
These terms get used interchangeably online, and they shouldn’t be. If you ask for one while picturing another, you’ll leave the salon disappointed:
| Trend | Base finish | Color intensity | Effect | Best for |
|---|---|---|---|---|
| Jelly nails | Evenly sheer, translucent | Clear color identity — you can name the shade | Candy-glass translucency | Playful color without opacity |
| Syrup nails | Sheer gradient, deeper at tip | Soft, blended, ombré-like | Natural “flushed” depth | Subtle, natural-looking color |
| Lip gloss nails | Sheer neutral only | Barely-there pink/nude | Your nails but juicier | Clean-girl minimalism |
| Glazed donut | Opaque milky nude | Neutral | Pearl veil over a solid base | Classic soft glam |
| Glazed chrome jelly | Sheer color + chrome veil | Translucent color with shimmer depth | Lit-from-within, angle-shifting glow | A statement finish without maximalism |
One detail worth knowing: the difference between jelly and syrup is usually the application map, not the product. The same sheer gel becomes “jelly” when applied evenly across the whole nail, and “syrup” when extra product is floated toward the free edge to build a gradient. One bottle, two trends.
What You Need
- Sheer jelly gel polish in your chosen shade
- Base coat — or, where the nail plate needs extra smoothing, a compatible soak-off builder gel
- No-wipe top coat suitable for chrome application, or a dedicated chrome gel if your brand requires one
- Sheer pearl, aurora or “unicorn” chrome powder (not metallic mirror pigment)
- Sponge or silicone chrome applicator
- Soft dust brush
- UV/LED lamp recommended for your gel system
- Standard prep tools: file, buffer, cuticle pusher, lint-free wipes
Chrome Jelly Nail Tutorial: Step-by-Step with Gel
The sequence below takes roughly 45 minutes on natural nails. Two moments decide whether the set looks glassy or muddy: foundation smoothness (step 2) and the chrome-compatibility check (step 4). Everything else is standard gel work.
Before anything touches the nail, prep has to be thorough. A sheer finish magnifies every ridge, every patch of leftover shine, every trace of dust. If your routine has gaps, start with our complete nail prep guide for beginners — under translucent color, prep quality is visible in the final result to a degree opaque polish never reveals.
- Prep the nail plate. Shape, push back cuticles, and gently remove only loose, non-living cuticle from the nail plate without cutting living skin. Buff lightly to remove shine, then clean and dehydrate the nail plate if required by your gel system.
- Lay a smooth foundation. Use a thin base coat for healthy, stable natural nails. A compatible soak-off builder layer may help when the nail plate needs additional smoothing or support — but note that not all builder products are designed for the same lamp and top coat system, so check compatibility first. Cure fully. If you’re unsure whether your nails need the extra structure, our comparison of gel nails vs builder gel explains when a builder foundation earns its place.
- Build the jelly color in thin coats. Apply one to two thin coats of sheer jelly gel, curing fully between each. Thin matters: the translucency is the trend. Two whisper-thin coats give depth; one thick coat pools unevenly and clouds the glass effect. Tilt the hand under your lamp light before committing to another coat — jelly color reads more saturated at an angle than straight-on.
- Prepare the surface for chrome — per your product’s instructions. Apply a no-wipe top coat and cure it for the time your top coat manufacturer recommends for chrome application. This varies genuinely between systems: some specify a shortened cure, others are designed for chrome over a full cure, and some brands sell a dedicated chrome-base gel. Use the lamp and cure schedule recommended for your gel system, and test on one nail before committing to all ten.
- Apply the chrome veil. Using a sponge or silicone applicator — never a bare finger, as skin oils create dull patches — rub a sheer aurora, pearl, or “unicorn” powder over the surface in light circular motions. Light pressure only. You want a veil, and the jelly color underneath should remain clearly visible. Dust off all excess with a soft brush.
- Seal and cap. Apply a final top coat, run the brush along the free edge to cap it, and cure fully according to the product’s instructions. An unsealed free edge is one of the most common starting points for chrome wear.
Why Chrome Wears Early on Jelly Nails (And How to Prevent It)
The most common complaint with any chrome finish: the manicure underneath is fine, but the chrome fades or flakes within days. In most cases the cause is one of three things.
1. The chrome and the surface weren’t compatible
Chrome needs a compatible cured surface, and systems differ — some fuse chrome after a shortened cure, others over a full cure, and some require their own chrome gel. Applying powder over a surface it wasn’t designed for gives it nothing to hold onto, and no technique fixes a product mismatch. If chrome keeps failing after you’ve followed the instructions carefully, try a different top coat before blaming your hands.
2. The free edge was never capped
Chrome wear commonly begins at the free edge. The final top coat must wrap over the edge to create a sealed envelope; miss it, and daily typing and dishwashing gradually peel the finish back from the tip.
3. The structure underneath is flexing
A less obvious cause is movement in the natural nail. When a flexible nail bends beneath a comparatively rigid gel system, the layers move at different rates, and fine surface cracking or edge wear can appear even when application was flawless. That’s a structural mismatch rather than an application error. Our deep dive into why gel nails lift and how to prevent it covers how nail flexibility and stress points decide whether any manicure survives daily wear.
The Best Summer Jelly Nail Colors for the Chrome Glaze
The palette leans toward soft, sun-warmed translucents rather than neons. These pairings come up most often in current inspiration content:
| Jelly base | Chrome veil | The effect | Skin tone note |
|---|---|---|---|
| Sheer coral | Gold-pearl aurora | Warm golden shimmer over coral | Glows on medium and deep tones |
| Butter peach | Soft white pearl | A jelly take on the glazed donut | Universally flattering |
| Translucent cherry | Red-shift aurora | Visible red tone with a translucent finish | Striking on fair and deep tones alike |
| Milky pink | Icy pearl | Soft neutral finish; office-proof | The safest all-rounder |
| Sea-glass blue | Blue-violet aurora | Cool-toned iridescent effect | Best on cool undertones |
Heavy silver mirror chrome is not included because its opacity can hide the jelly base entirely — at which point you’ve made regular chrome nails with extra steps. For pearl chrome jelly nails to read as intended, stick to powders described as sheer, aurora, or iridescent rather than metallic.
Glazed Chrome Jelly Nails on Short Nails
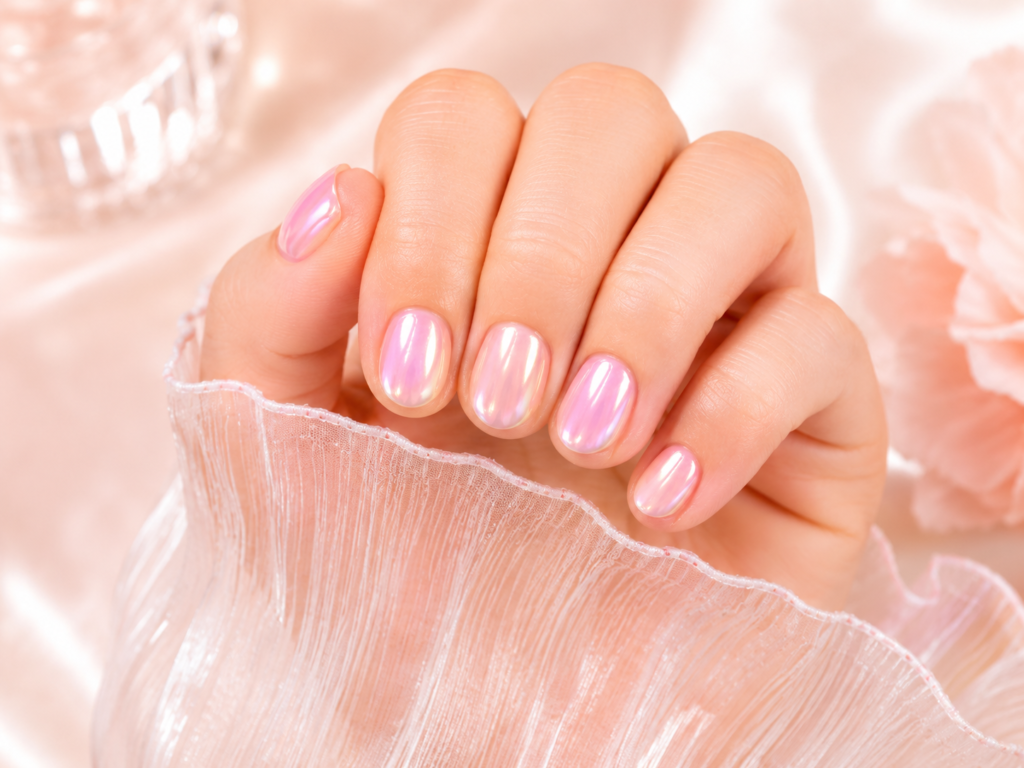
This finish is especially well suited to short lengths, and the reasons are structural. Translucent finishes make even a plain oval read as intentional — the light play does the design work that length usually does. The sheer base keeps the grow-out line subtle, which is where short-nail manicures usually fall apart visually. And a shorter free edge takes less daily leverage, which reduces exactly the tip wear chrome is prone to.
The jelly technique itself has been spreading across nail art in several directions — including the sculpted glass-dome style in our 3D gummy nails tutorial, which layers a clear builder dome over the same sheer jelly base. Same foundation, very different destination.
Pricing, Removal — and Safety
Pricing: many salons charge a chrome or nail-art add-on for this service, because the layering and chrome application take extra time and product. Pricing varies by salon and location, so ask whether chrome application is included in the base manicure price or charged as a separate add-on.
Removal depends on the products underneath. Soak-off gel systems can usually be removed after filing through the top coat and chrome layer — the chrome veil is surprisingly effective at slowing acetone penetration, which is why skipping the break-the-seal filing step makes removal feel endless. Hard gel or non-soak-off builder products must be filed down according to the manufacturer’s instructions rather than soaked.
Related Guides on NailStyleLab
Nail Prep for BeginnersThe pro prep routine that decides whether any gel set lasts — doubly critical under sheer finishes. → Why Gel Nails Lift and How to Prevent It
The structural reasons manicures fail early, including flexible nails under rigid systems. → Gel Nails vs Builder Gel
When your jelly set needs a builder foundation — and when plain gel polish is enough. →
Frequently Asked Questions
What are glazed chrome jelly nails?
How long do they last?
What’s the difference between jelly nails and syrup nails?
Can I do this look on short natural nails?
Why does my chrome powder keep wearing off?
Do I need special chrome powder for the jelly glaze effect?
Final Thoughts
Glazed chrome jelly nails earn their popularity by solving a practical problem: they give visible color and dimension without requiring an opaque finish or a high-maintenance grow-out. The technique looks complex on camera, yet in practice it adds only a modest amount of time over a standard gel service.
If you try it, milky pink with an icy pearl veil is the subtle starting point; sheer coral with gold aurora gives a fuller warm effect. What matters most in practice: keep the jelly coats thin, follow the manufacturer’s chrome instructions for your specific top coat, and cap the free edge when sealing. Those three details have the greatest effect on clarity and wear.
- Chrome application timing, surface compatibility, and cure schedules: always defer to your specific top coat and chrome powder manufacturer’s instructions — formulations differ meaningfully between brands.
- Lamp compatibility: gel manufacturers publish which lamps and cure times their products were tested with; wattage alone is not a reliable indicator of complete curing.
- Skin safety with UV gel products: guidance on avoiding skin contact with uncured gel and on acrylate allergy and sensitization risk is published by dermatology bodies such as the British Association of Dermatologists, as well as by product manufacturers — review it before home application.