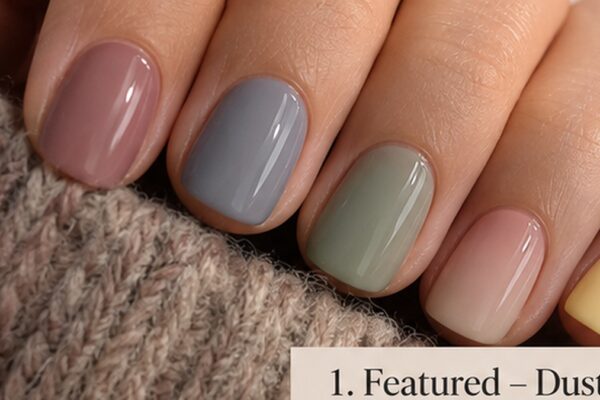
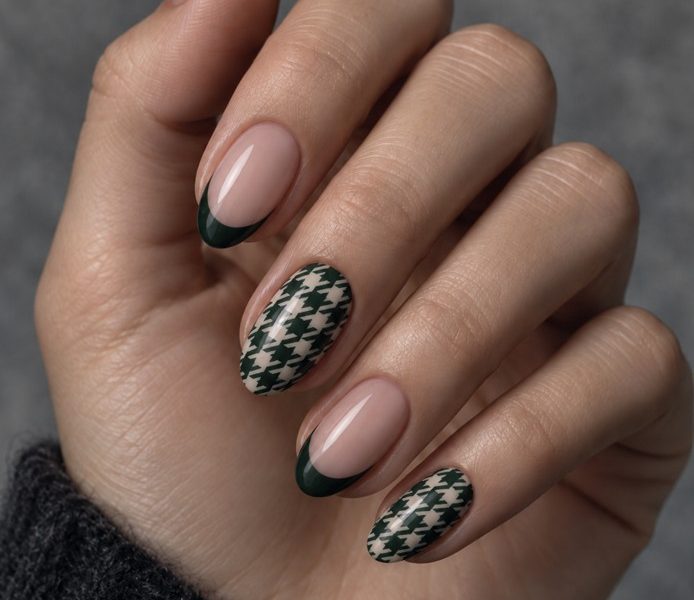
Quick answer: The winter BIAB nail trends this season split into two groups. Soft looks use a sheer pink or milky BIAB base with icy details: silver glitter French tips, frosted ombré, snowflakes and shimmer. Darker looks put espresso, navy, burgundy or forest green over the builder layer, often with cat eye gel, chrome, houndstooth or plaid. All ten designs below start from the same BIAB base routine.
Winter is hard on nails. Dry heating indoors, cold air outside, gloves on and off, hands in and out of hot water. Natural nails get brittle and start peeling at the free edge, and a thin gel manicure that behaved in September is chipping by the second week of December.
That’s why BIAB comes up so often this time of year. A layer of builder gel gives the natural nail some structure without the length or bulk of extensions, and it holds colour and nail art well. You get a manicure that survives the season and a base you can keep infilling.
The winter BIAB nail trends this year pull in two directions. One is quiet: sheer pink bases, micro French tips, a single snowflake, a milky shimmer that looks like frost on a window. The other goes richer and darker, with espresso brown, midnight navy with a cat eye shift, deep burgundy and forest green, plus patterns borrowed from winter coats and scarves.
All ten designs below sit on the same almond shape and a sheer natural base, so you can switch between them. Each comes with materials and steps. Most are realistic at home with an LED lamp and a basic BIAB kit. The 3D chrome swirl and the houndstooth take practice, and we flag that where it applies.
This is an editorial style guide, not a ranking based on sales or salon booking data. The designs were chosen for their winter colour and how well they suit a BIAB overlay.
Why Winter Nail Art Works So Well on BIAB
Fine lines, stamped patterns, cat eye shifts and chrome all show every ridge underneath them. BIAB self-levels, so it fills small dips in the natural nail and leaves a smooth curve to paint on. Liner work is easier on that than on bare nails.
It also changes how the colour reads. A sheer or milky BIAB shade looks like your own nails on a good day, which is why so many of these designs leave most of the nail bare and keep the detail at the tip or on one accent finger. Darker shades go on top of the cured builder layer as ordinary gel polish.
Every design in this post begins with the same base routine:
- Push back the cuticle, clean the nail plate, and take the shine off with a fine buffer. Just break the surface gloss.
- Wipe with dehydrator, and add primer if your brand calls for it.
- Brush on a thin scrub layer of BIAB and cure it for the time your product and lamp specify.
- Apply a second layer, drop a small bead near the stress area to build the apex, and let it self-level. Cure.
- Look at the nail from the side. If the apex needs work, file lightly and remove the dust.
If a design uses the BIAB shade as its base, move straight to the art. If it needs a solid colour, apply gel polish over the builder.
On curing: builder gel gives off heat as it sets, and thicker layers produce more of it. If you feel a sharp heat spike, pull your hand out briefly, then put it back. More on that in why BIAB burns under the lamp. Two thin layers are kinder to the nail bed than one heavy one.
The 10 Winter BIAB Designs at a Glance
| Design | Skill level | Key extra product |
|---|---|---|
| Silver glitter French with snowflakes | Intermediate | Fine silver glitter gel |
| Midnight constellation | Intermediate | Navy cat eye gel |
| Forest green houndstooth | Advanced | Stamping plate and stamping gel |
| Frosted ombré with starburst | Intermediate | Icy blue shimmer gel |
| Snow glaze shimmer | Beginner | Iridescent fine glitter gel |
| Liquid chrome swirl | Advanced | 3D gel and silver chrome powder |
| Burgundy micro French | Beginner | Wine jelly gel |
| Espresso cat eye | Beginner | Brown or copper cat eye gel |
| Midnight velvet cat eye | Beginner | Navy cat eye gel |
| Chocolate plaid | Intermediate | Striper brush |
10 Winter BIAB Nail Designs and How to Do Them
For all ten designs, complete the BIAB prep and builder application described above. Unless a design says otherwise, cure each layer as you go, finish with no-wipe top coat and cap the free edge.
1. Silver Glitter French with Snowflake Accents
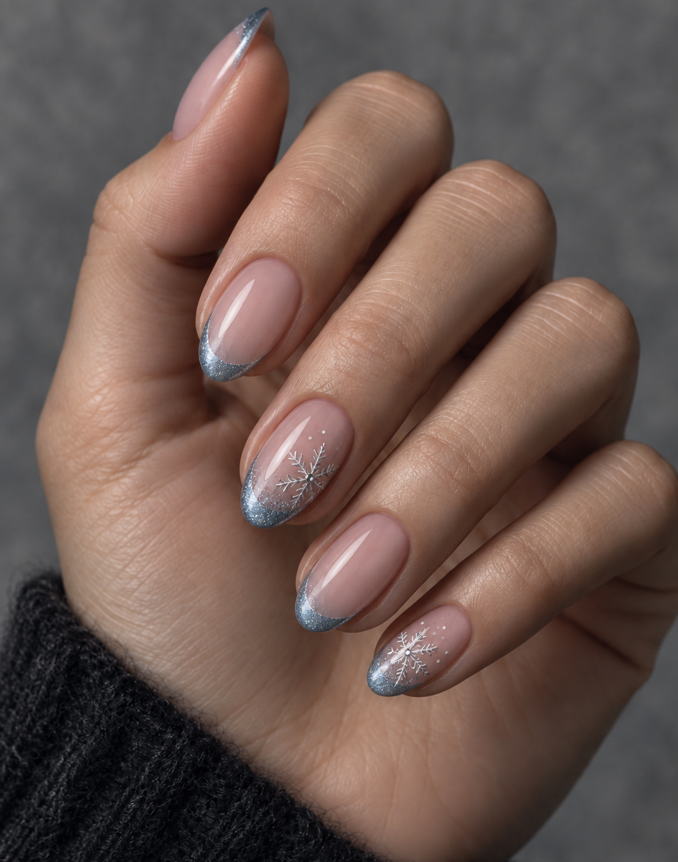
Sheer pink base, silver glitter tips on every nail, and a snowflake on the middle and pinky. The snowflakes sit just above the smile line and slightly off centre, as if they’ve drifted onto the nail.
What you’ll need
- Sheer pink BIAB
- Dense, fine silver glitter gel
- Striper brush and a fine liner brush
- Silver or white gel paint
- Micro silver studs and gel glue
- Dotting tool
How to do it
- Draw a deep, curved smile line in glitter gel with the striper and fill the tip. Dense glitter usually needs two thin passes, cured in between.
- Before the second cure, wipe most of the gel off the brush and drag a few specks just past the line. That gives the slightly diffused inner edge in the photo.
- Cure a thin layer of top coat over the glitter so you have a smooth surface for the art.
- Draw three lines crossing at one point to make six arms, then add a short V near the end of each arm. Cure.
- Set a micro stud in the centre with gel glue, add three or four white dots around the flake, and cure.
Uneven arms are what make a snowflake look rushed. Practise a few on a swatch stick before you go near the nail.
2. Midnight Constellation
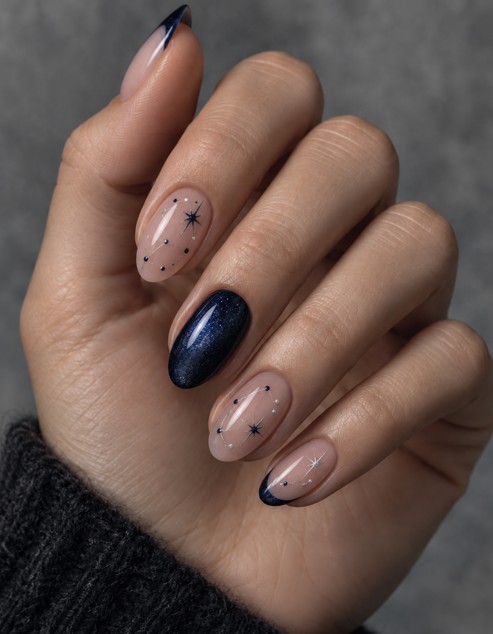
Three techniques on one hand. The middle nail is a full navy cat eye, the index and ring carry small constellations anchored by a sharp navy star, and the thumb and pinky get a navy micro French.
Materials
- Nude BIAB
- Black gel polish and navy cat eye gel, plus a magnet
- Navy gel paint and silver liner gel
- Fine liner brush and dotting tool
- Micro silver studs
Steps
- Do the cat eye nail first. One coat of black, cured, then two thin coats of navy cat eye. Hold the magnet at an angle over the second coat for a few seconds and cure immediately.
- Paint a thin navy line along the free edge of the thumb and pinky. Cure.
- For each star, draw one long vertical stroke and a shorter horizontal one across it, then four very short diagonals. A dot at the centre sharpens it. Cure.
- Scatter five or six dots around the star, mixing navy and silver. Cure.
- Join a few of the dots with barely-there silver lines and cure.
- Press two or three studs onto constellation points and cure.
Keep the connecting lines lighter than the dots. When the lines get as heavy as the dots, the constellation starts to look like a dot-to-dot puzzle.
3. Forest Green Houndstooth
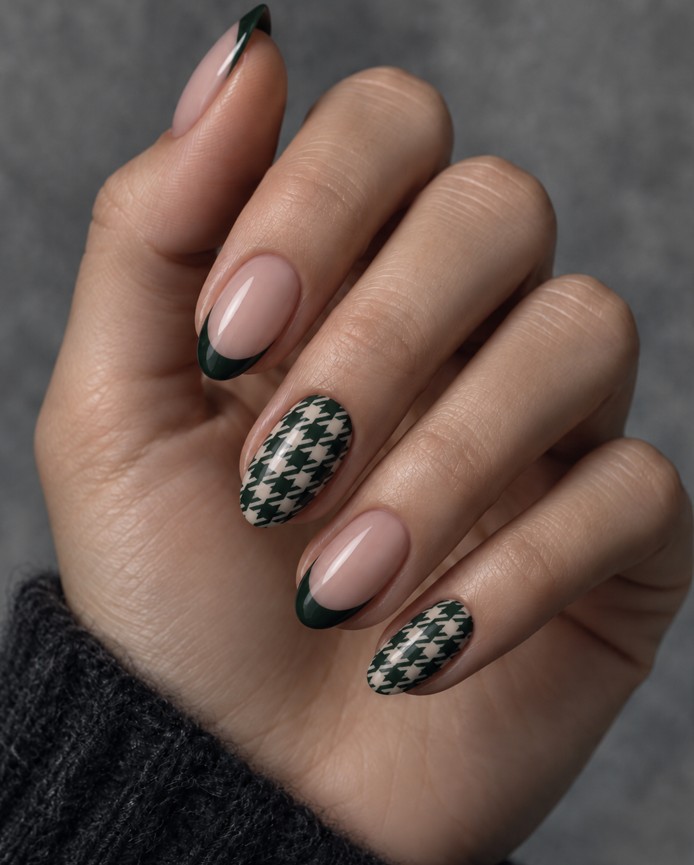
This is one of the few designs in the set where stamping beats hand painting. Houndstooth depends on even spacing, and small inconsistencies become obvious very quickly. You’ll need a houndstooth stamping plate, a stamper and scraper, and dark green or black stamping gel alongside a cream and a deep forest green gel polish.
Paint the green French tips on the thumb, index and ring first. Dark shades show every wobble, so build the line in two thin passes. For the middle and pinky, use two thin coats of cream, then seal them with no-wipe top coat before stamping. Scrape the plate at about 45 degrees in one firm pass, and roll the image onto the nail from one side to the other rather than pressing straight down. Clean any print off the skin before you cure.
Watch for: stamping onto a tacky surface. It’s the easiest way to smear the pattern, and a smeared houndstooth can’t be rescued; you have to remove it and start the nail again.
4. Frosted Ombré with Starburst
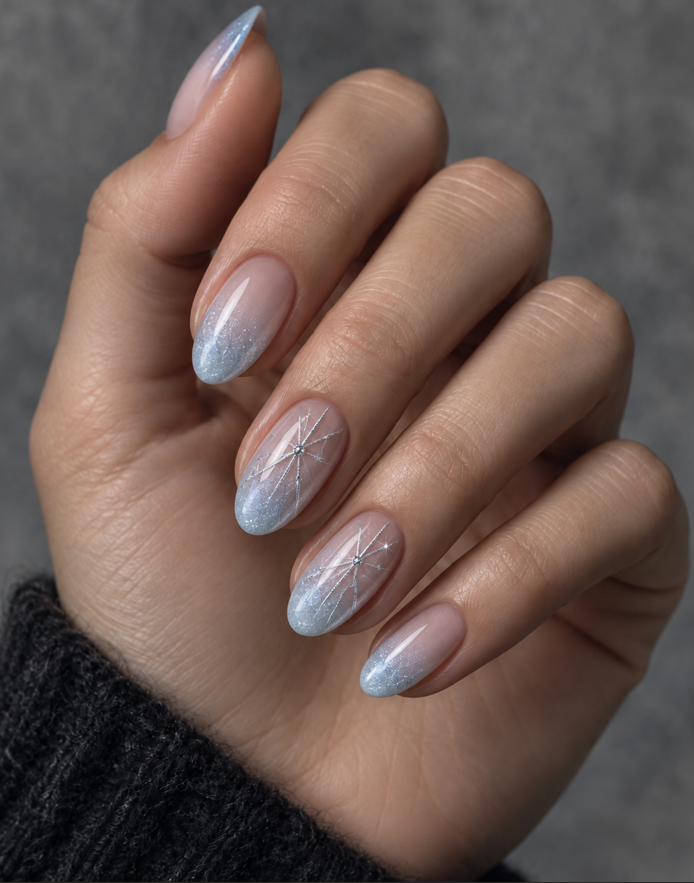
Sheer pink fading into frosted icy blue at the tips, with silver starbursts on the middle and ring. The gradient does most of the work. You’ll need an icy blue fine glitter gel, a small flat brush, silver liner gel and a few small flatback crystals.
- Apply the blue glitter gel over roughly the tip third of the nail.
- With a clean, dry flat brush, pull the top edge toward the cuticle in short strokes, wiping the brush after each one. Stop about halfway up. Cure.
- Add a second, smaller layer at the free edge only and cure. This deepens the tip so the fade looks gradual.
- Pick a point in the upper middle of the nail and draw eight to ten fine silver rays out from it, alternating long and short. Cure.
- Set a crystal on the centre point with gel glue and cure. Keep the top coat around the crystal, not over it.
Skip the makeup sponge for this one. It works with regular polish, but with gel it leaves you dabbing uncured product onto the skin, and a brush gives a cleaner fade anyway.
5. Snow Glaze Shimmer
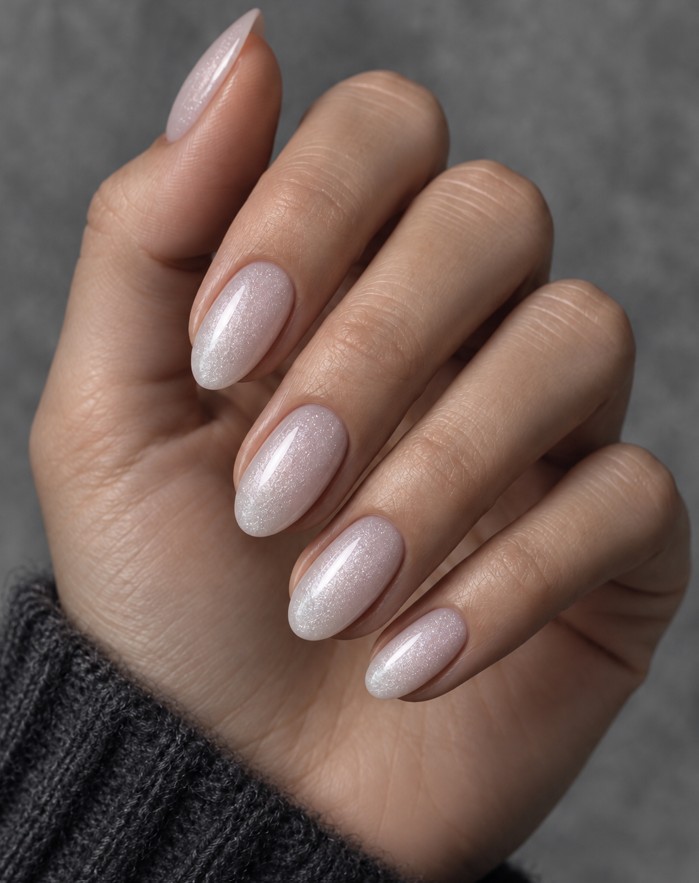
The simplest design here and probably the one you’ll wear longest. Milky pink on every nail, with fine iridescent shimmer that gets denser toward the tip.
Best for: beginners, and anyone who wants to stretch the time between infills. Milky shades hide regrowth at the cuticle far better than dark colours.
Build the base in thin layers of milky pink BIAB, since milky shades streak easily. Brush a sheer coat of iridescent glitter gel over the whole nail and cure, then a second coat on the tip half only. Glitter leaves the surface slightly rough, so float a thin layer of clear BIAB over it before the top coat.
6. Liquid Chrome Swirl
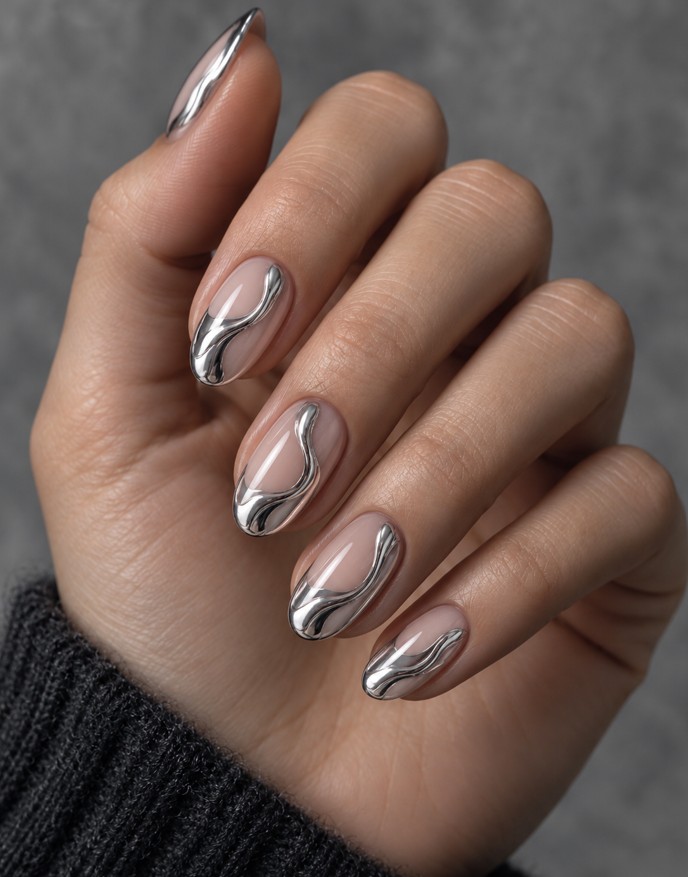
Raised silver lines run along the tip and curve up the nail in a mirror finish, like poured metal. It’s the hardest design in the list.
Why it’s difficult
Chrome magnifies everything underneath it. A line that looks a little uneven in clear gel looks lumpy once it turns silver, so the sculpting stage decides the result. The chrome itself is the easy part.
What you’ll need
- Nude BIAB
- 3D or sculpting gel that holds its shape without spreading
- Small detail brush
- Cleanser and lint-free wipes
- No-wipe top coat
- Silver chrome powder, silicone applicator and a soft dust brush
- A chrome-specific top coat, if you can find one
Technique
- Work one nail at a time. Lay a line of 3D gel from one side of the free edge, along the tip, and up the nail in a loose S.
- Add a little more product to the middle of the line and let the ends taper.
- Flash cure for a few seconds to stop it spreading, then give it a full cure.
- Look at the line from the side. If one section is noticeably higher, file it down now; you won’t get another chance.
- Wipe the whole nail with cleanser. Chrome powder sticks to any tacky surface, so the base has to be completely clean.
- Paint no-wipe top coat over the raised lines only and cure.
- Buff chrome powder onto the lines until they turn to mirror, then sweep away the loose powder.
- Seal the whole nail, making sure the edges of each line are fully covered so the chrome doesn’t lift.
Expect the top coat to soften the mirror slightly. That’s normal, and a top coat made for chrome keeps more of the shine.
7. Burgundy Micro French
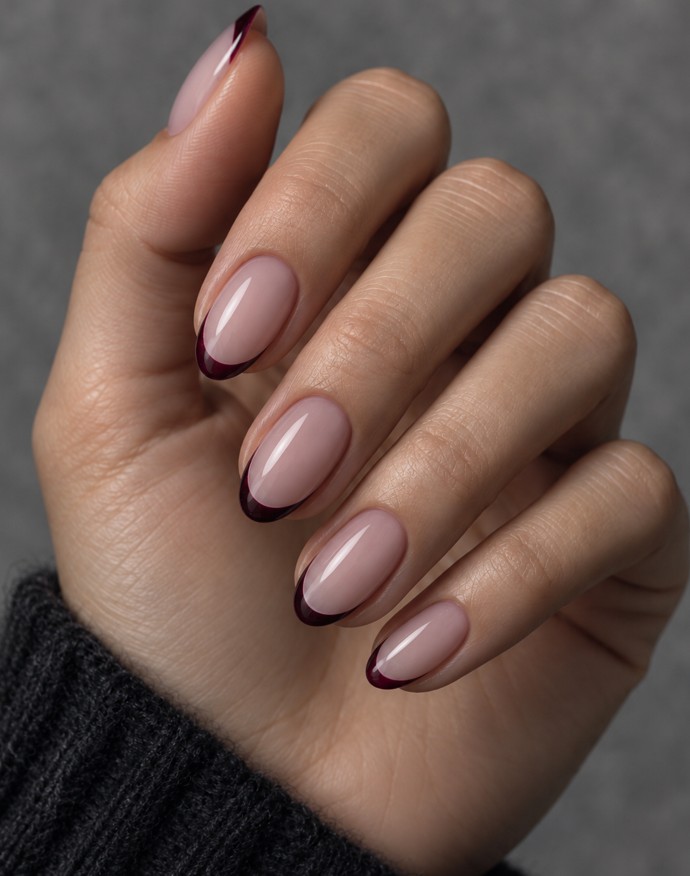
The quickest design in the set: a sheer pink BIAB base and a burgundy jelly gel for the tip. The jelly finish gives the translucent, glass-like edge in the photo. An opaque cream burgundy looks flatter and heavier.
Turn the finger slightly sideways and build the line from each corner toward the centre rather than drawing the whole curve in one go. Keep it around one to two millimetres wide. A second thin pass gives the jelly enough depth without making the edge look heavy.
Move the finger, not the brush. Rotating the hand under a steady brush gives a smoother arc than trying to curve your wrist.
8. Espresso Cat Eye
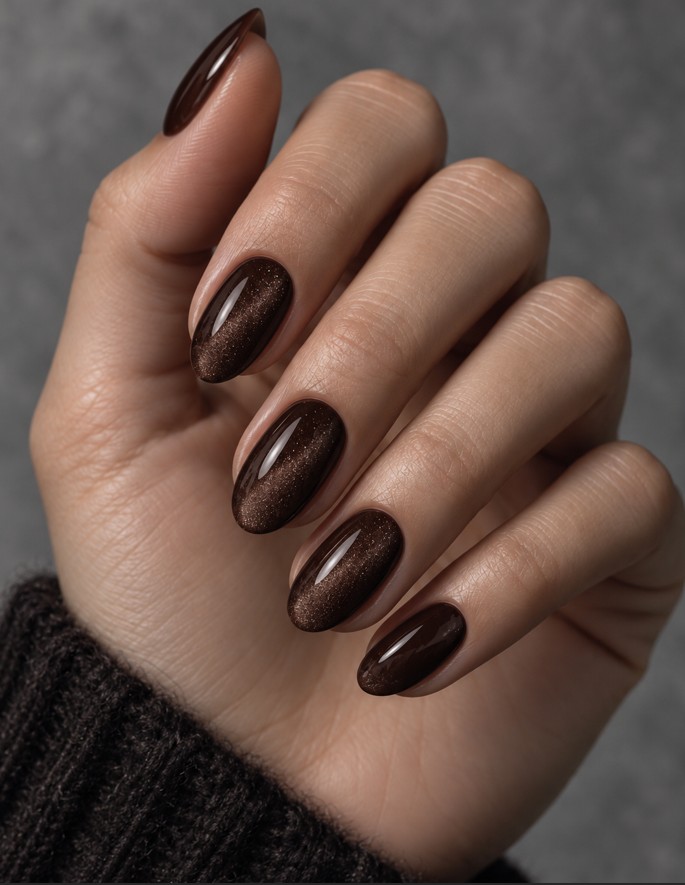
Dark espresso brown with a soft copper shimmer running through it, closer to velvet than to the sharp stripe people usually picture with cat eye. It’s a good first try at magnetic gel, because the diffused finish hides small mistakes in magnet placement.
Start with one thin coat of espresso gel polish over the cured builder layer. The darker backing makes the copper shimmer look noticeably deeper.
Add a thin layer of brown or copper cat eye gel and cure it, then apply a second coat and leave it uncured. Move the magnet slowly around the nail instead of holding it still; that scatters the particles into a soft glow. Once the shimmer sits where you want it, cure straight away. Left sitting, the particles drift back.
What makes the biggest difference: keeping the magnetic gel thin. A heavy coat gives the particles too much room to move, and the finish turns muddy and hard to control.
9. Midnight Velvet Cat Eye
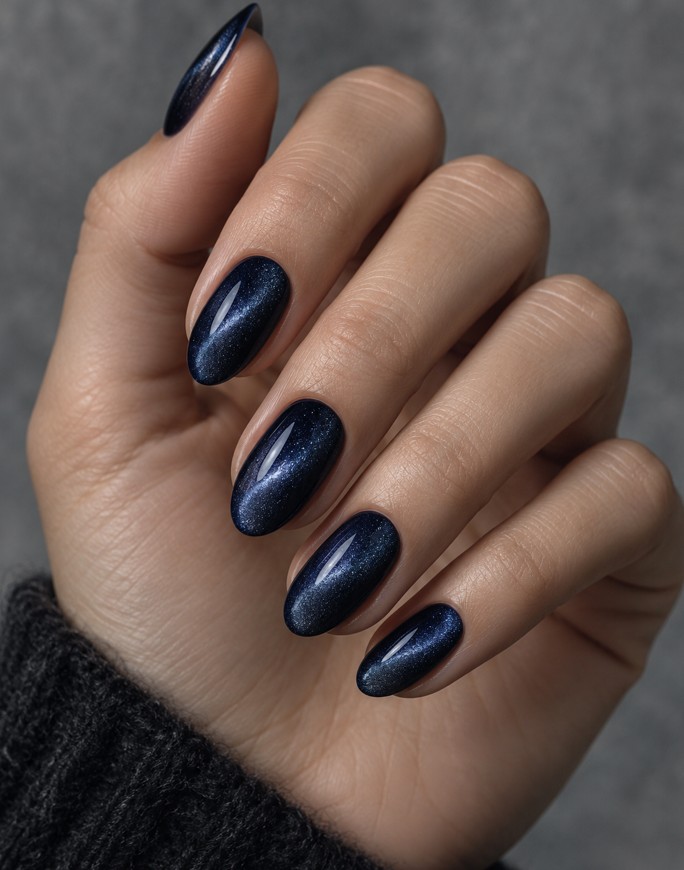
Same method as the espresso version, with two changes.
The backing is black instead of brown. Navy cat eye over black gets that almost bottomless depth you see in the photo.
The magnet stays still. Here you want a defined diagonal band, not a scattered glow, so hold a bar or pen magnet flat against one sidewall near the tip for two or three seconds, then tilt it so it lies diagonally across the lower half of the nail. The shimmer gathers along the magnet’s edge. If the angle is off, put the magnet back and redo it; nothing is fixed until you cure.
Match the band angle on every finger. It’s a small thing, but it’s what makes the set look deliberate.
10. Chocolate Plaid
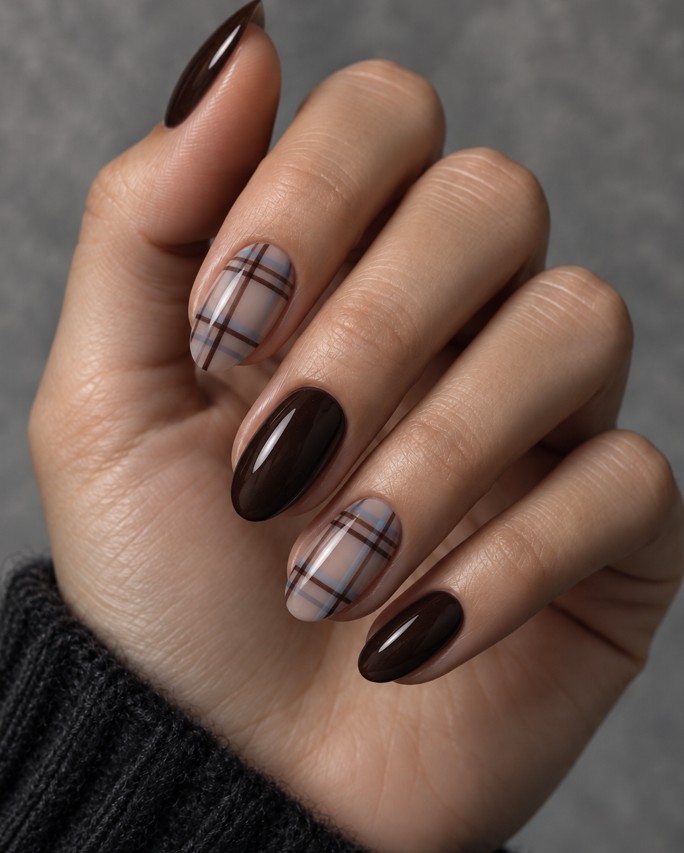
Glossy chocolate on the thumb, middle and pinky, with plaid on the index and ring. The pale blue lines are what keep it from looking like a generic check. They cool the brown down and tie it to winter. You’ll need chocolate gel polish, dark brown and pale blue gel paint, and a striper brush.
- Give the three solid nails two thin coats of chocolate, curing each.
- Seal the nude plaid nails with no-wipe top coat so the lines stay sharp.
- Draw two close parallel brown lines across the nail, then another pair lower down. Cure.
- Cross them with two vertical brown pairs. Cure.
- Run a single pale blue line beside each brown pair, in both directions, and cure.
Spacing matters more than straightness. A slight wobble looks like fabric; uneven gaps look like a mistake.
Picking Your Winter BIAB Look
If you want one set to carry you from December to February, go for the snow glaze or the burgundy micro French. Both leave the base mostly sheer, so regrowth at the cuticle stays discreet and you can push the time to your next infill.
The cat eye designs are the easiest way into darker shades. They look more complicated than they are, and once you’ve done two or three nails the magnet timing becomes instinct.
Save the chrome swirl and the houndstooth for when you have a spare evening and some patience. Both are worth it, but neither rewards a rushed attempt.
On short nails, the burgundy micro French and both cat eye designs translate best. The houndstooth and plaid need more nail surface for the pattern to read, and on a short squoval they can look crowded.
Whichever you pick, the base is what keeps it wearable. When it’s time for a change, file off the top coat, colour and any art, leave a thin layer of builder gel, and infill over it rather than removing everything. Not sure when? See how often BIAB should be redone. Chrome, studs and crystals need to be filed away completely before you start the new design.
One last thing. Keep uncured gel off your skin. Repeated contact is how people develop sensitivity to gel products, and that can end your gel manicures for good. Clean up before each cure, every time.
Frequently Asked Questions
What colours are trending for winter BIAB nails in 2026?
Sheer pink, milky white, silver, deep navy, espresso brown, burgundy and forest green are the main colours used across the ten looks in this guide.
Can you put cat eye gel over BIAB?
Yes. Cure the BIAB fully, then apply cat eye gel on top as you would any gel polish. A black or dark backing coat between the two makes the magnetic effect look deeper.
Can you do nail art directly on BIAB?
You can, and BIAB is a good surface for it because it self-levels. For fine lines and stamping, cure a layer of no-wipe top coat first so the art sits on a non-tacky surface.
Which winter BIAB design is easiest for beginners?
The snow glaze shimmer, followed by the espresso cat eye. Neither needs liner work, and both hide small mistakes well.
Do I need to remove BIAB completely to change designs?
Usually not. File away the top coat, colour and art, keep a thin layer of builder gel, and infill. Remove everything only if the base has lifted or you want a break from gel.