The brown is the easy part. It’s the shimmer that can catch you out. A chocolate cat eye swatch might look softly golden in a photo, then turn almost silver when you tilt it. Another looks brown under the salon lamp and practically black once you step outside.
Chocolate cat eye nails are magnetic gel manicures in a brown base, where iron particles in the polish are pulled into a band of reflection that shifts as your hand moves. The brown decides the mood; the reflective colour decides how loud it is. For short nails, that second choice matters more than adding another detail: a broad, hazy reflection gives you a different manicure from a thin bright stripe, even when both start with the same brown.
Chocolate is showing up in current autumn coverage, too. Who What Wear’s September 2026 nail colour edit includes chocolate brown, while Beauty Company’s autumn 2026 selection specifically includes brown cat eye. Here are twelve ways to wear that combination on nails you can comfortably keep short.
Choose Your Brown Before Your Design
“Chocolate” covers quite a lot. Milk chocolate has a lighter, creamy look; espresso can disappear into black in dim light. Then there are the reddish browns, which look much warmer beside the skin than a grey-based mocha.
Don’t worry about finding a strict match for your skin undertone. Hold two swatches beside your hand and see which one you actually like. Include the reflective colour in that decision. If you wear silver rings every day, you may prefer a cooler flash even if the brown underneath is warm.
| Design | Colour and reflection | Detail to get right on short nails |
|---|---|---|
| Milk-chocolate velvet | Medium brown, soft champagne glow | Leave the surface free of extra artwork |
| Espresso diagonal | Deep brown, narrow bright stripe | Dark colour should stay visible on both sides |
| Chocolate French | Sheer neutral, magnetic brown tip | A shallow tip works better than a deep band |
| Cocoa and copper | Warm brown, copper reflection | Check that the shimmer doesn’t look too orange |
| One cat eye accent | Plain brown with one matching magnetic nail | Compare the two browns side by side |
| Mocha and silver | Grey-brown, cool silver flash | Fine shimmer gives a smoother appearance |
| Chocolate side French | Sheer base, curved brown side tip | The diagonal edge needs to stay slim |
| Brown and tortoiseshell | Chocolate shimmer, amber accent | Leave space between the tortoiseshell patches |
| Sheer cocoa | Translucent brown, scattered soft light | Some natural nail will show through |
| Chocolate and wine | Brown cat eye with a plain burgundy accent | Keep both colours at a similar depth |
| Chocolate with a fine gold curve | Chocolate cat eye, small gold detail | One fine line, on one nail per hand |
| Three chocolate shades | Milk chocolate, cocoa and espresso | Match the reflective tone across the colours |
12 Chocolate Cat Eye Nail Ideas for Fall 2026
1. Milk-Chocolate Velvet
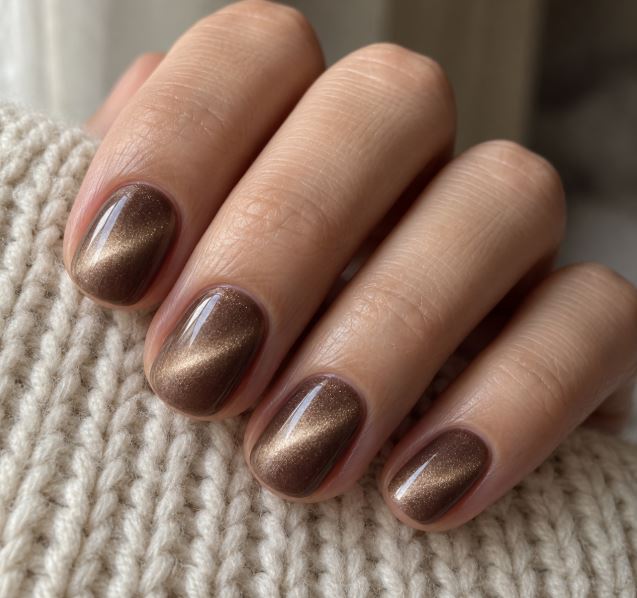
This is where I’d start if you haven’t worn brown before. A medium milk chocolate keeps enough colour in ordinary indoor light, and the spread-out shimmer gives it a softer appearance than a sharp stripe.
Picture it on short round nails with no art on top. The pale reflection moves across the curve when you turn your hand; there’s already plenty to look at. A cream knit or a faded denim sleeve is enough of a backdrop.
One thing to clarify at the appointment: “velvet” means the way the magnetic shimmer looks, not a matte finish. You can still have a glossy top coat. If your reference has that glassy shine, show it rather than asking for a velvet finish and leaving the interpretation open.
2. Espresso With a Diagonal Flash
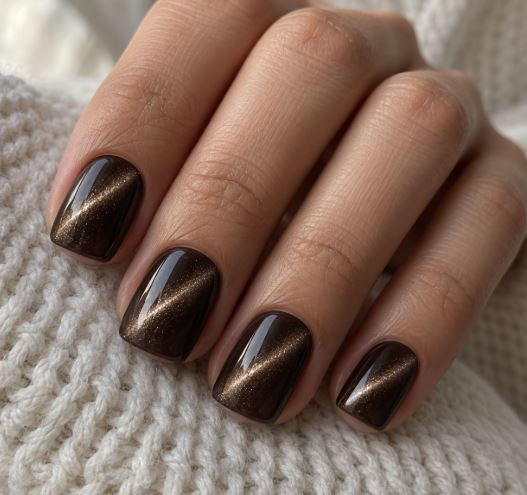
Go darker here. Espresso with a slim champagne stripe looks almost like a plain dark manicure until the light finds it. On short square nails, a diagonal gives the colour a little movement without needing a drawn pattern.
The stripe needs room around it. If the entire nail looks bright, you’ve lost the contrast that makes this version interesting — ask for a more concentrated reflection with visible brown on either side. And be honest about how dark you want to go. If you dislike black nails, the darkest espresso swatch probably isn’t the one, however good it looks under a ring light.
3. Chocolate Cat Eye French Tips
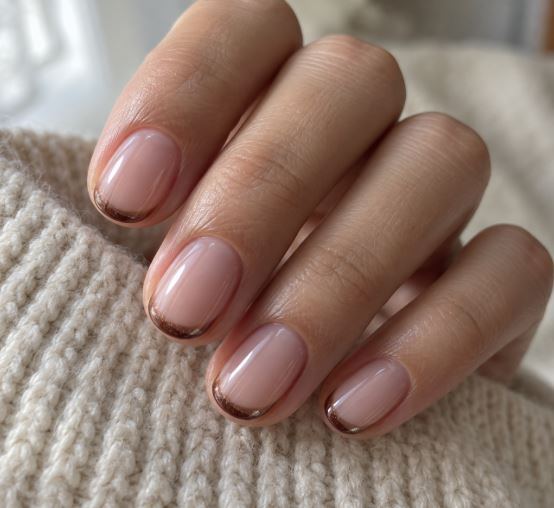
A brown French is a smaller commitment than a full brown nail. Use a sheer pink-beige base and put the magnetic colour just along the tip. The line can follow the natural edge; it doesn’t need a deep smile.
You do lose some of the cat eye effect when you squeeze it into a tiny area. Expect a reflective edge, rather than the large moving band you see on full-cover designs. That’s part of the appeal if you normally stick to plain French tips.
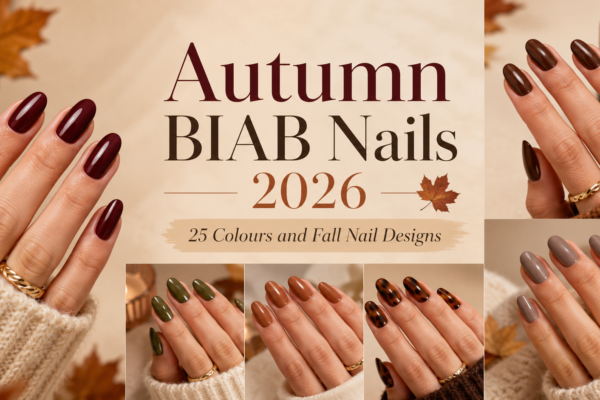
For more ways to use brown with a neutral base, the autumn BIAB nail guide has a broader mix of fall colours and finishes.
4. Cocoa With a Copper Reflection
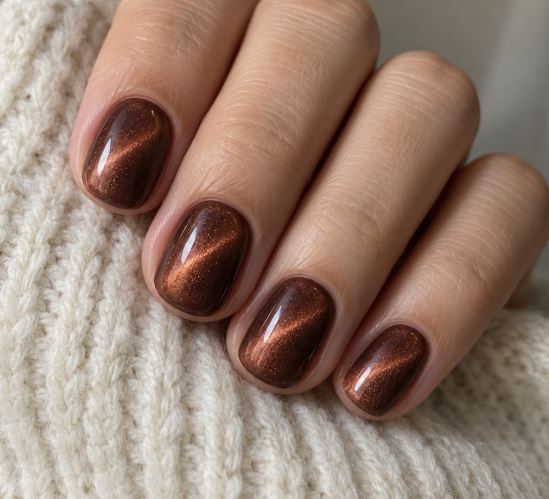
For anyone who finds beige-brown a bit flat, copper adds warmth immediately. Choose a cocoa base with a reddish metallic reflection and keep the same colour across all ten nails.
This one can turn orange more easily than you expect. Check the swatch from the side, where the reflection is strongest, and decide whether you still like it. A muted bronze is an alternative if the copper overwhelms the brown. I’d keep the shape rounded and skip gold foil here — the copper is already the detail.
5. Plain Chocolate, One Magnetic Nail
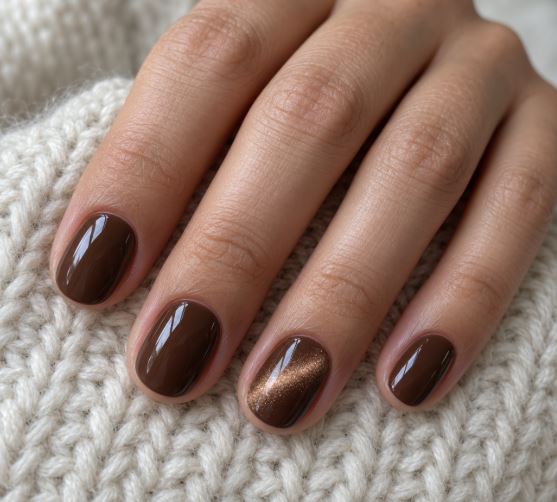
You don’t have to make the entire set reflective. Four plain chocolate nails and one cat eye nail per hand give you a quieter version, especially when the browns are close in colour.
Matching them is the fiddly part. A plain reddish brown beside a cool magnetic taupe can look like two unrelated manicures. Put the swatches together before choosing. They don’t need to be identical, but they should make sense next to each other.
The ring finger is an easy place for the accent. The thumb is another option if you want a larger patch of shimmer and prefer the other fingers plain.
It’s also the cheapest way to find out whether you like magnetic gel at all, since you’re only committing one nail per hand to it.
6. Cool Mocha and Silver
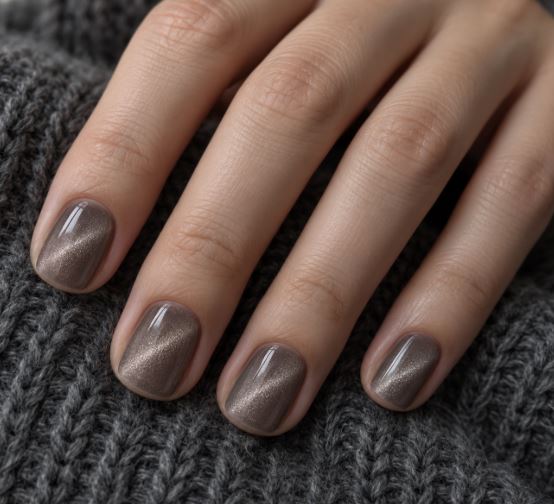
Not every autumn manicure needs a golden glow. Grey-brown with a fine silver reflection looks good beside navy cuffs, charcoal jumpers and silver jewellery. It has a cooler appearance than the caramel and copper versions above.
Keep your usual short shape. There’s no reason to file toward almond just because a reference photo shows it that way. A rounded square gives the colour a neat outline without needing extra length. If you’re unsure what to request, our nail shape guide explains the differences between round, oval and squoval.
7. A Chocolate Side French
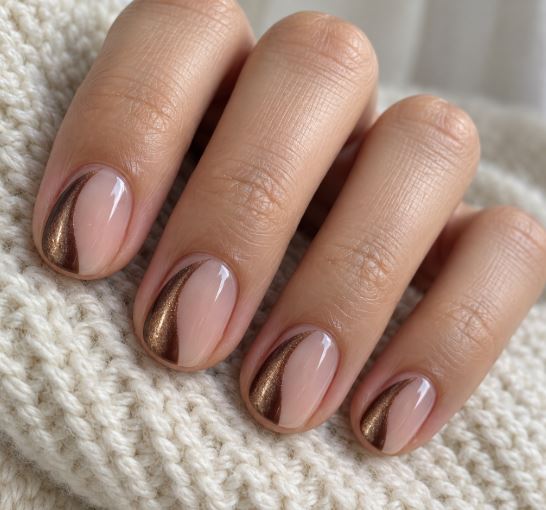
Instead of taking the brown straight across the tip, curve it down one side of the nail. Leave a sheer neutral base visible on the other side. That gives the magnetic colour a little more space than a micro French while keeping much of the nail light.
The brown section should taper as it travels down. A thick block can look heavy on a short nail, particularly on the little finger. It doesn’t need the same width on every finger; it needs to fit the space.
8. Chocolate Cat Eye With Tortoiseshell
Amber tortoiseshell makes a good neighbour for chocolate brown. Try one patterned nail on each hand and leave the rest in a soft brown cat eye.
Give the amber some breathing room. On a short nail, densely packed brown patches can merge into a dark blur, so fewer marks are usually easier to read. You want to see the translucent background between them.
The two finishes already give the set variety. If you love an elaborate mixed manicure, keep that idea for a version with more space for it.
9. Sheer Cocoa
Think of this as the brown option for someone who always picks a sheer pink. The nail stays partly visible, with a wash of cocoa and a soft reflection over it.
That transparency needs to be something you like. Your natural free edge may still show, and the result won’t look identical on every nail if their underlying colour varies. Choose a purpose-made sheer magnetic shade if you’re after this effect, rather than expecting an opaque dark brown to look the same. If seeing the natural tip will bother you all week, the milk-chocolate version is the safer pick.
10. Chocolate and Wine
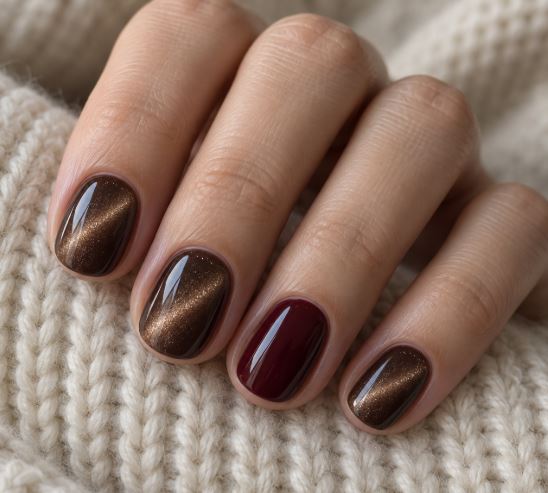
One plain wine-red nail breaks up a brown cat eye set without taking it far outside an autumn palette. The red should be deep enough to sit alongside the chocolate. A bright cherry makes a much stronger contrast.
Try burgundy on the ring finger and magnetic brown everywhere else, with a glossy finish throughout. If you’re torn between red and brown at the appointment, this is a reasonable way to wear both.
Keep the burgundy plain for this version. Its solid colour lets you appreciate how much the neighbouring brown changes when you move your hand.
11. Chocolate With a Fine Gold Curve
A tiny gold curve near the base of one nail adds a little jewellery-like detail. It looks especially good with warm champagne shimmer underneath.
The line needs to be finer than you might think. Close-up nail photos make a short nail look huge; a detail that seems delicate on screen can take up half the available space in person. A small painted arc is enough, with a clean margin around the skin.
Have it on one nail per hand and leave the others alone. That’s the version I’d choose for a dinner or an autumn wedding when a plain brown set feels a little too everyday.
12. Three Shades of Chocolate
Milk chocolate, cocoa and espresso make a tonal set without requiring five different browns. Repeat two shades across the hand: dark on the thumb and little finger, medium on the index and ring finger, light in the middle.
Look for a similar reflection in all three. Champagne across the set will hold it together; a random green flash in one colour will stand out much more than a small difference between the brown bases.
If you’re shopping for the colours, our cat eye gel polish set comparison is a useful place to check what the kits actually include. A large colour count isn’t much help if only one shade suits the manicure you want.
Getting the Finish You Actually Wanted
A saved photo can be misleading with magnetic polish. You might be looking at the one angle where the entire nail lights up. Ask to see the swatch tilt, or bring a short video as your reference. Look at the brown when the reflection moves away, too; that’s a colour you’ll be wearing just as often.
For the simplest version of this look, here’s a clear salon brief:
“I’d like to keep them short, with softly rounded corners. Medium chocolate brown, a champagne reflection and a glossy top coat. Can I see the swatch moving? I want a soft velvet effect rather than a sharp stripe.”
Swap the last sentence if you prefer the espresso diagonal. Being specific about the reflection helps more than collecting half a dozen different brown reference photos.
If you’re applying cat eye gel yourself, the magnetic pattern is shaped before the gel is cured — once it’s under the lamp, the effect is fixed. Use the product’s specified curing instructions and a compatible lamp. Our cat eye magnet guide covers the tools; the guide to cat eye effects that won’t form or keep disappearing covers common application problems.
A Few Questions That Come Up With Short Cat Eye Nails
Are my nails too short for chocolate cat eye?
No — a full-cover cat eye design works on short nails and doesn’t need a long tip. When there is very little free edge, choose an all-over finish or a single accent nail. A detailed French pattern needs more careful scaling to fit the same space.
Should chocolate cat eye look gold or silver?
Either works, because “chocolate” describes the brown base rather than a fixed reflective colour. Choose gold or bronze for a warmer look, champagne for something softer, or silver if you like a cooler contrast.
Do I need a black base under chocolate cat eye gel?
Not for every formula — follow the instructions for your particular polish and check its swatches. A black base may make the result darker than the milk-chocolate reference you had in mind.
Which chocolate cat eye design is easiest to choose?
Milk-chocolate velvet on your usual short shape is the easiest starting point. See the swatch in motion, choose a reflection you like, and leave off the extra art. You can add a French tip or a gold detail at the next appointment if you still want one.