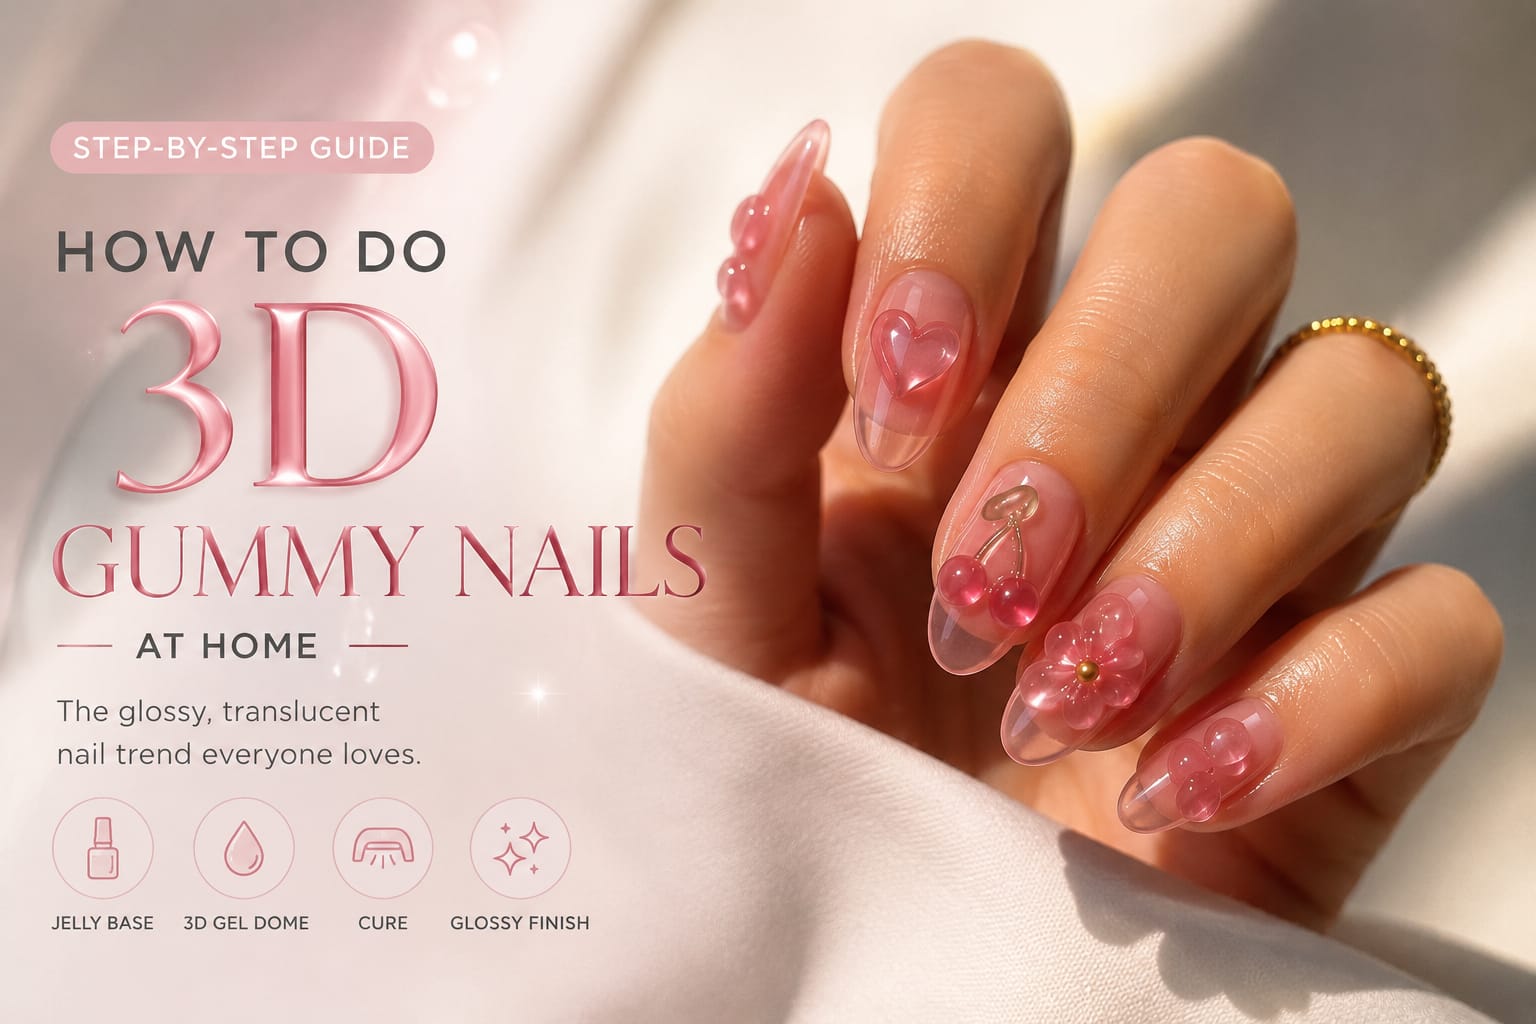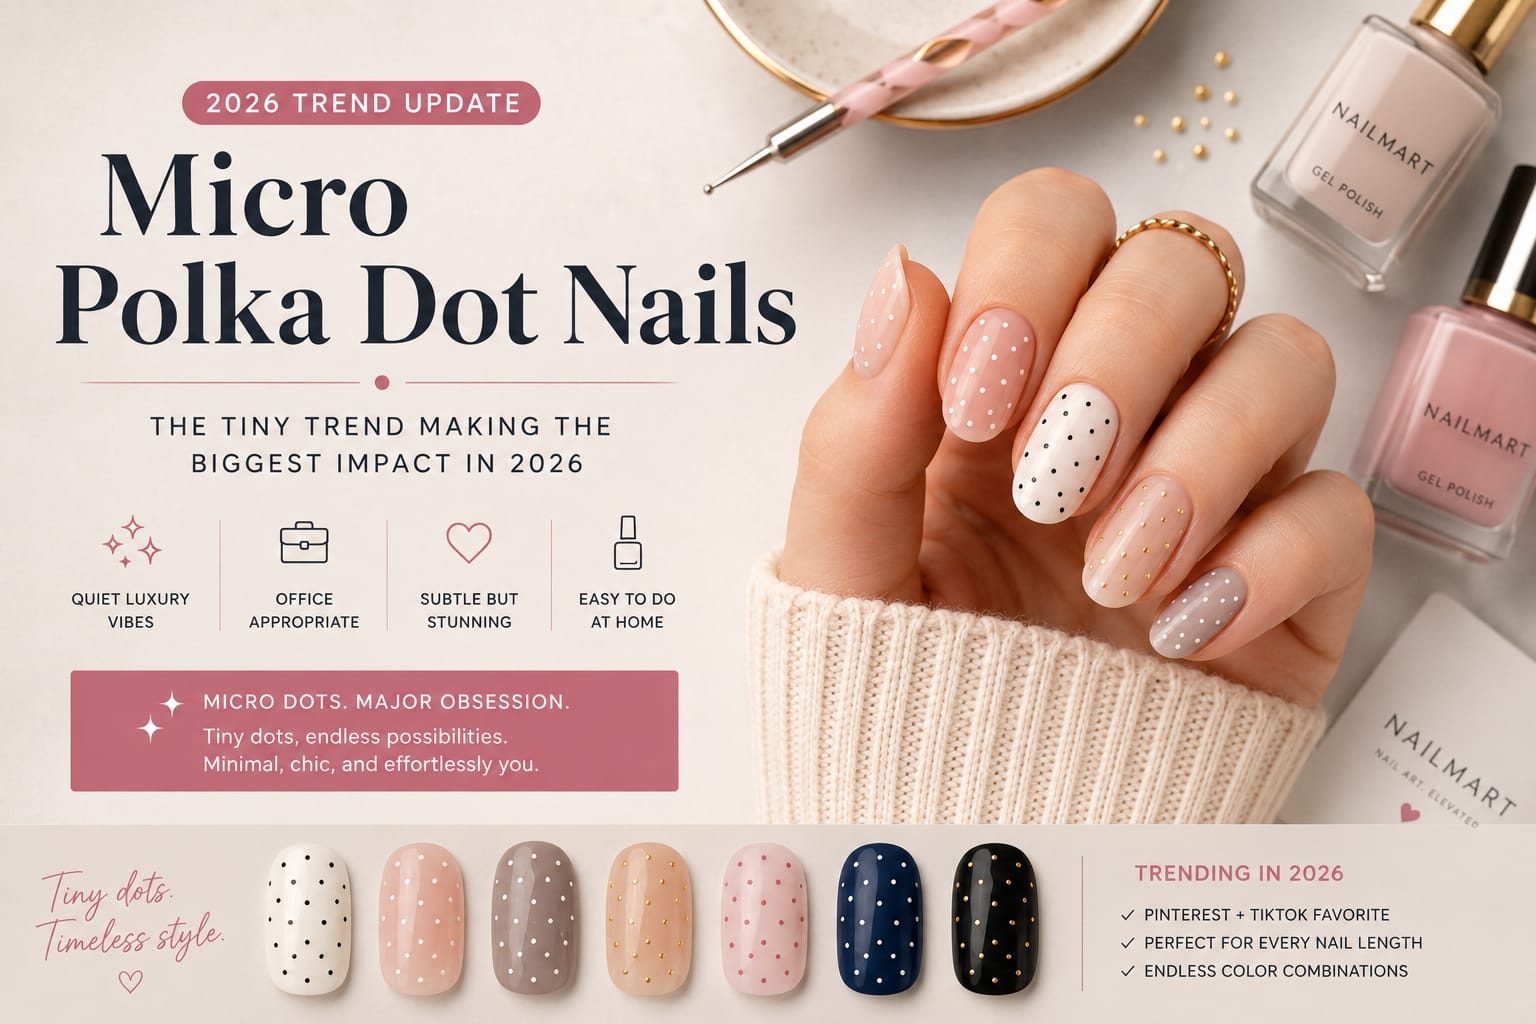
Micro Polka Dot Nails: Quiet Luxury Meets Minimal Nail Art
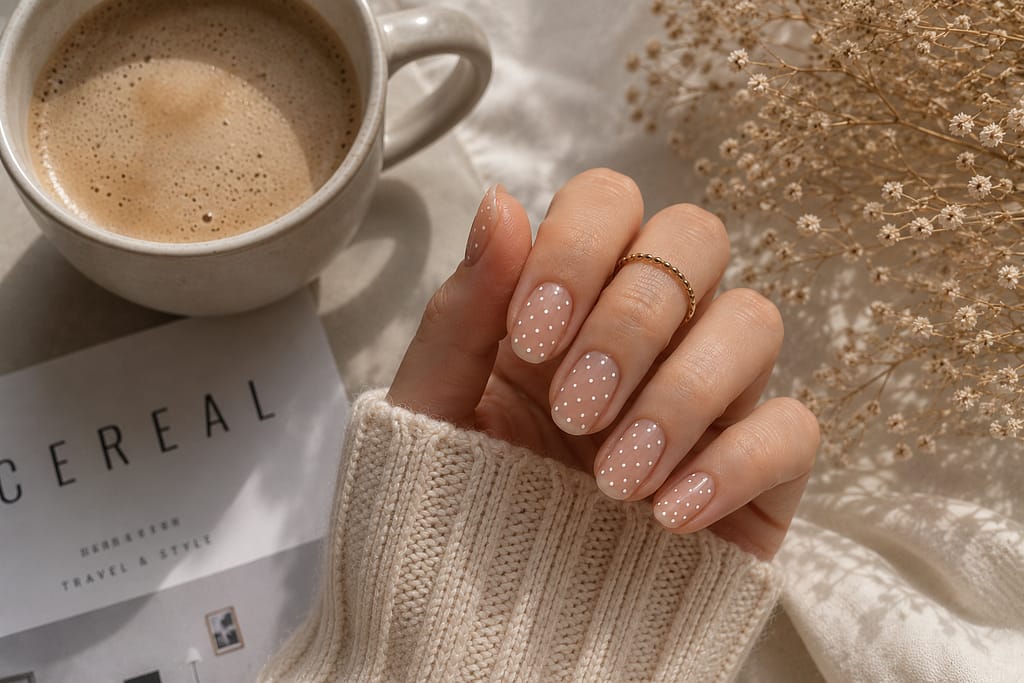
I almost scrolled past it. A set of sheer ballet-pink nails covered in the tiniest white dots I had ever seen — and then my thumb just stopped. That was my first real encounter with micro polka dot nails, and I have been obsessed ever since. What started as a handful of Pinterest saves turned into a full deep-dive, three practice sets, and more dotting tools than I care to admit.
Why Micro Polka Dot Nails Are Everywhere Right Now
There is a reason this trend keeps appearing across nail inspiration feeds. We have been living in the era of quiet luxury, clean manicures, sheer pinks, soft neutrals, and minimal nail art. But for many people, a plain neutral manicure starts to feel too safe after a while. Micro polka dot nails land right in the sweet spot: they are clearly nail art, but they still look polished, wearable, and refined.
The beauty of this look is scale. Classic polka dots can feel retro, playful, or bold. Micro dots feel softer and more intentional. They create a repeating pattern that almost looks like fabric texture, especially on sheer or neutral bases.
Why this trend works so well
- It looks detailed without feeling loud.
- It works on short nails, almond nails, square nails, and natural lengths.
- It photographs well for Pinterest, Instagram, and TikTok-style closeups.
- It fits quiet luxury, office nail art, bridal nails, and minimalist nail design.
The micro dot look feels connected to fashion as much as beauty. Tiny repeating patterns, sheer textures, and delicate detail have been appearing in clothing and accessories for years — and nail art often follows those visual cues.
The Micro Polka Dot Nail Looks You Actually Want to Try
Not all micro dot nails are the same. The base color, dot size, spacing, and contrast completely change the final mood. Here are the most wearable versions to save before your next manicure.
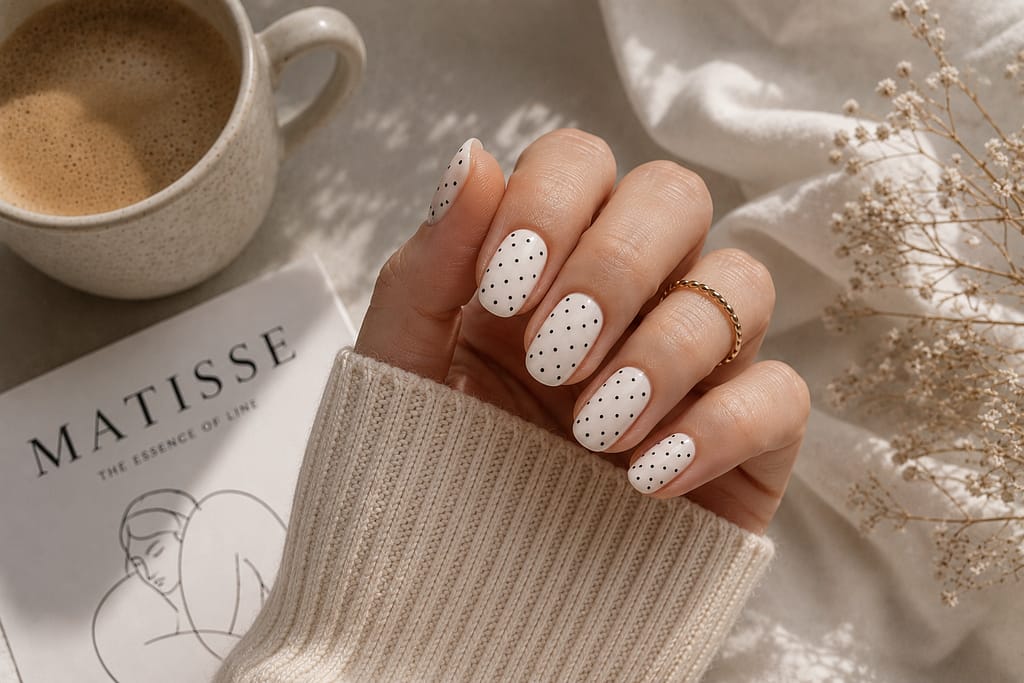
Black dots on white, or white dots on black. This is the clearest version of the trend. The key is keeping the dots genuinely tiny — bigger than 2mm and the look becomes regular polka dots instead of micro polka dot nails.
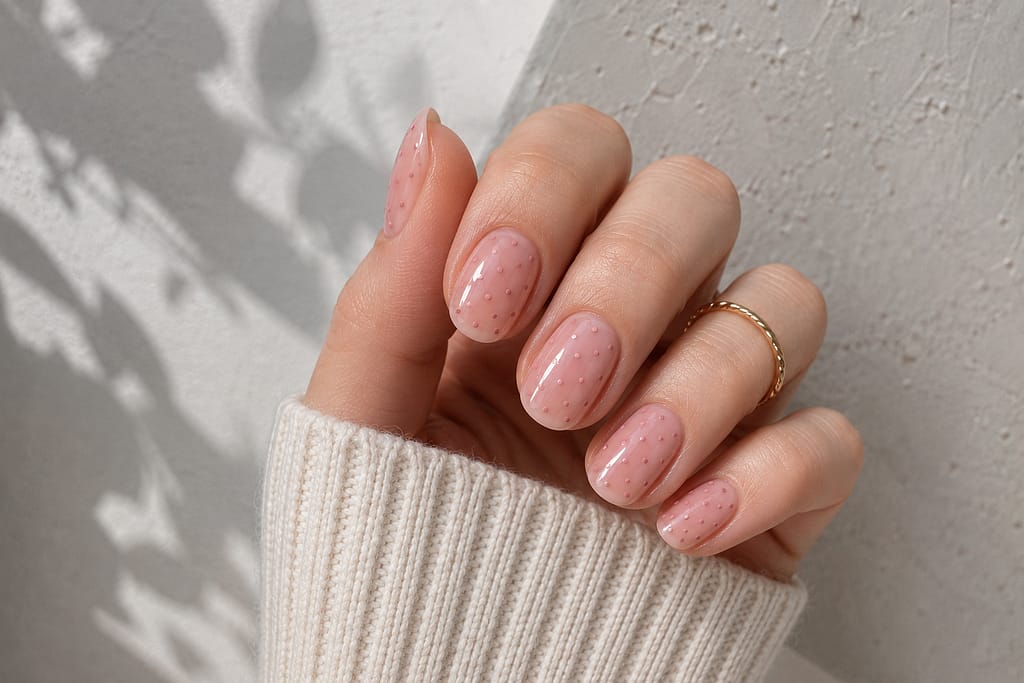
A sheer jelly pink base with slightly deeper pink dots gives a barely-there effect. In soft lighting, the dots almost disappear. In bright light, the detail becomes visible and elegant.
Gold or champagne dots on beige, nude, or camel polish create one of the most expensive-looking versions of this trend. It is subtle enough for everyday wear but still feels special.

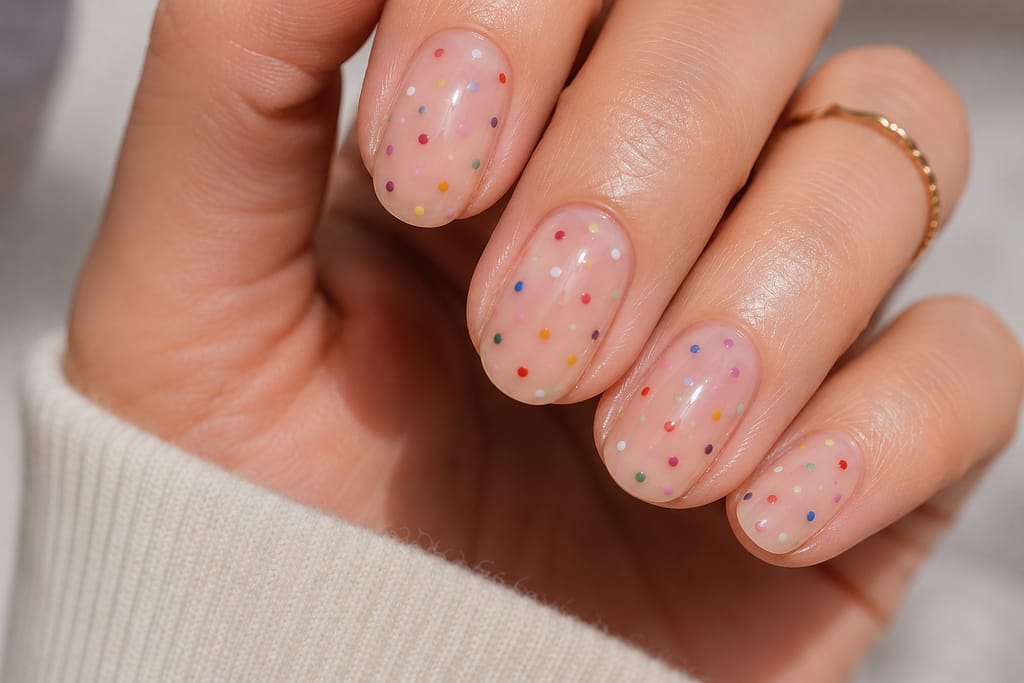
Multiple dot colors scattered across one or two accent nails can look playful without becoming messy. Keep the base simple and limit the dots to two or three colors for the cleanest result.
Do not place dots all the way into the cuticle area. Leave a tiny natural margin so the design looks cleaner and the top coat can seal the nail properly.
How to Do Micro Polka Dot Nails at Home
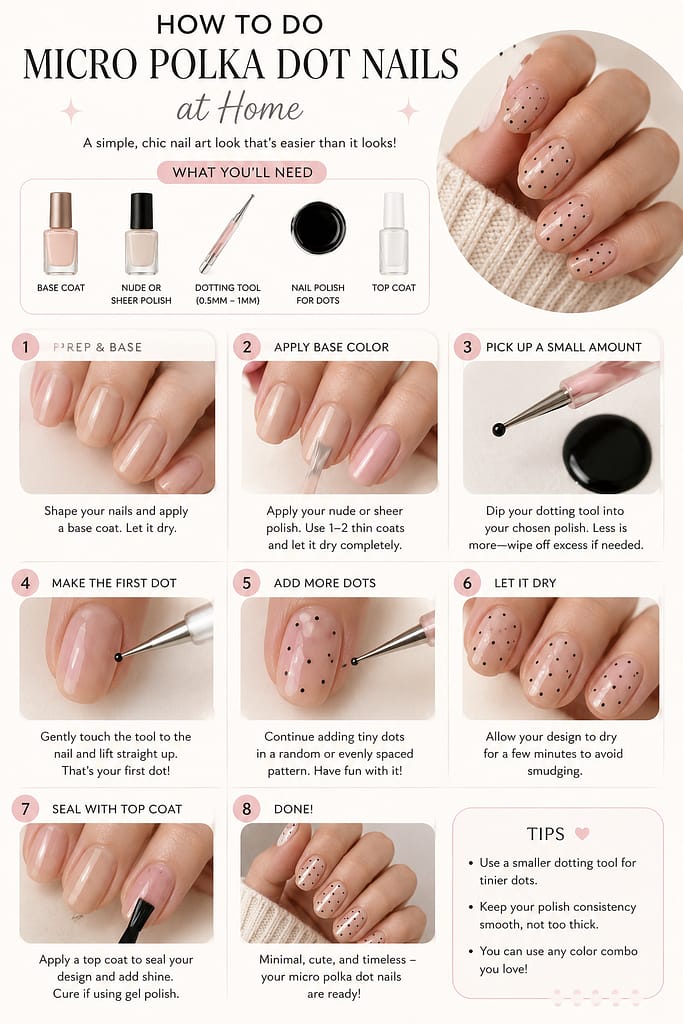
Micro polka dot nails look simple, but the small scale makes technique important. The goal is not just dots — it is consistent dot size, clean spacing, and a smooth sealed finish.
- 1Prep the Nail First
Push back cuticles, lightly buff the surface, remove dust, and cleanse the nail. A clean base helps the polish or gel adhere better.
- 2Apply Your Base Color
Use two thin coats for regular polish or gel. If you are using a sheer base, build coverage slowly with thin layers.
- 3Load the Dotting Tool Lightly
Use a small dotting tool, toothpick, or fine nail art tool. The product on the tip should look like a tiny bead, not a blob.
- 4Press Straight Down
Touch the tool to the nail, press gently, and lift straight up. Do not drag the tool sideways because that creates smears instead of round dots.
- 5Work Slowly Across the Nail
Start from the center or one side and keep your spacing consistent. For gel, flash cure small sections if you are worried about smudging.
- 6Seal With Top Coat
Apply a smooth top coat over the entire design and cap the free edge. This protects the dots and helps the manicure last longer.
If you are working with gel, use gel-compatible nail art paint or gel polish for the dots. Regular polish over cured gel may not wear as well unless the surface and top coat are handled correctly.
The Tools That Actually Make a Difference
You do not need a professional kit to create this look, but the right tool makes the result cleaner. A double-ended dotting tool with very small tips is the easiest option. If you do not have one, a toothpick can work for regular polish, although the dots may be slightly less uniform.
For gel manicures, nail art gel or highly pigmented gel polish usually works better than thin, runny formulas. The product should stay where you place it instead of spreading across the nail.
Micro polka dot nails suit almost everyone, but they are especially flattering on short nails because the repeating pattern can make the nail look more delicate and intentional.
Color Combos Worth Saving Right Now
Vanilla + chocolate brown dots gives a soft latte-inspired look. Sage green + off-white dots feels fresh and botanical. Deep burgundy + gold dots looks polished for evening or event nails. Sky blue + white dots is perfect for spring and summer. Slate grey + black dots creates a tonal, minimal, slightly moodier version of the trend.
Minimal nail trends are everywhere right now — especially sheer finishes, glossy neutrals, and soft BIAB overlays. If you want even more inspiration beyond micro polka dot nails, explore these summer BIAB nail trends for additional minimalist manicure ideas.
Too many bright colors can make micro dots look busy. For the most elegant result, use two colors. If you want a playful set, use three colors at most.
Micro polka dot nails work because they sit between minimal nails and full nail art. They are easy to personalize, wearable for everyday life, and detailed enough to feel fresh. If you want a nail design that looks delicate but still noticeable, this is one of the easiest trends to try.
Micro Polka Dot Nails — Frequently Asked Questions
The Final Verdict
Micro polka dot nails are small, but the effect is surprisingly strong. Start with a sheer base and one dot color, keep the spacing clean, and seal everything with a glossy top coat. That is usually all it takes to make this tiny nail trend look polished instead of messy.