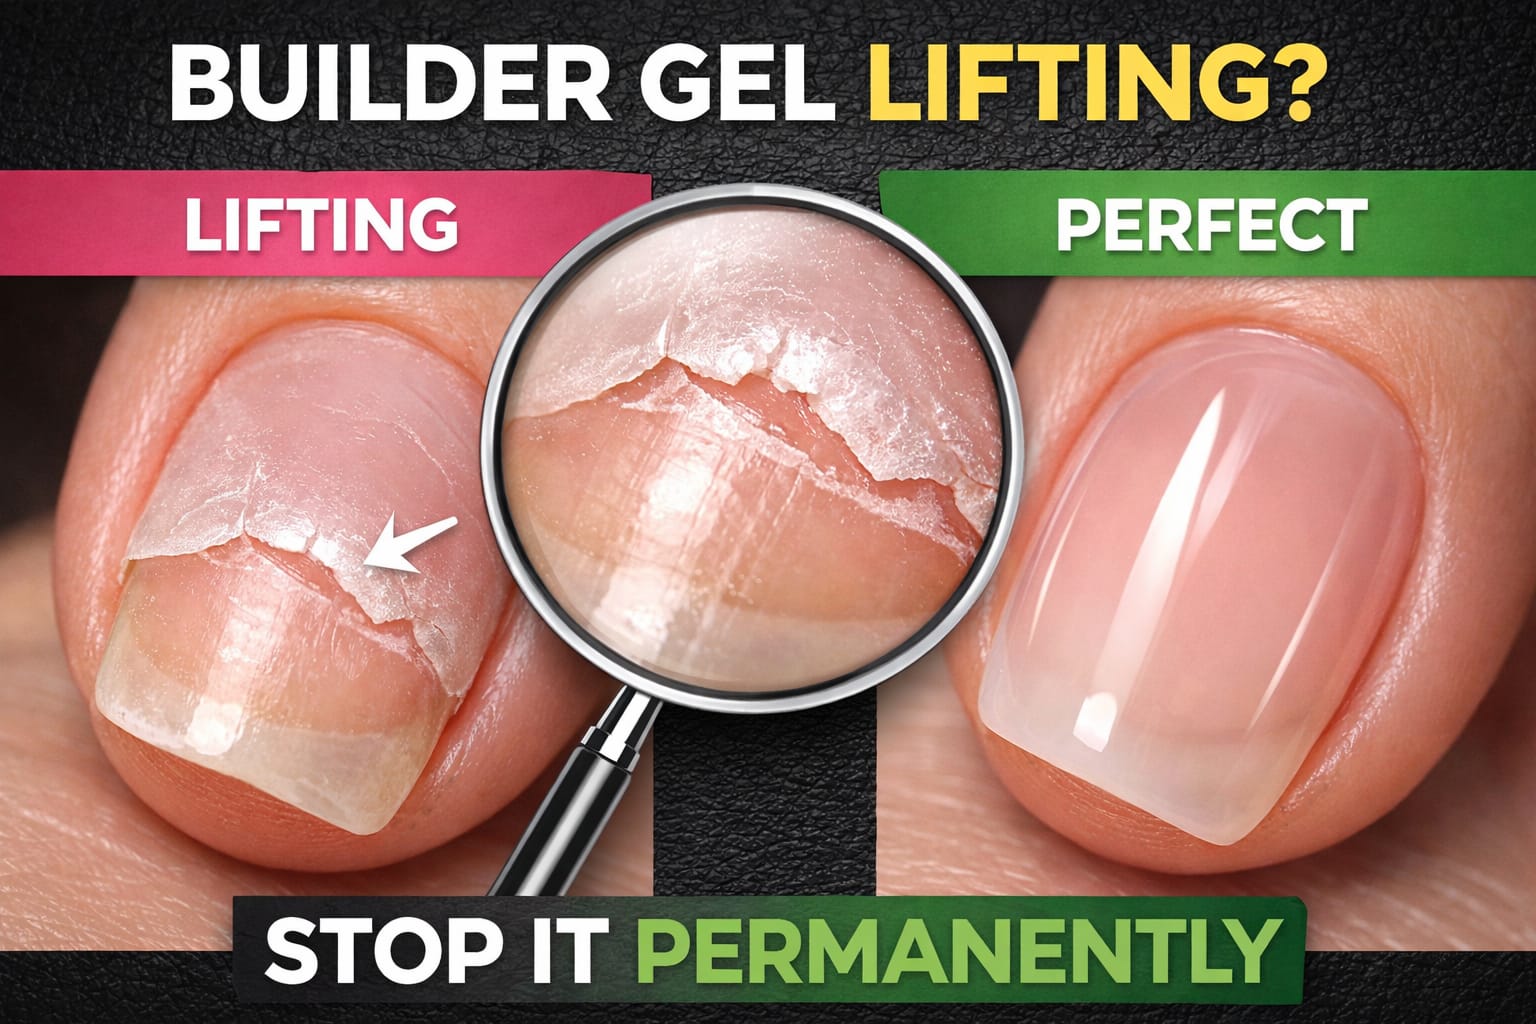
How to Stop Builder Gel Lifting Permanently

You spent 90 minutes on that set.
It lifted in 4 days.
And you still don’t know why.
You’ve re-prepped. Switched primers. Changed brands. Filed harder. Applied thinner. Applied thicker. Watched every tutorial twice. And the builder gel still lifts.
Here’s what nobody is telling you: you’re not failing at the fix — you’re fixing the wrong problem. Builder gel lifting is not one issue. It’s at least five completely different failures that look identical from the outside. Treat them the same and you’ll get the same result every single time.
Builder gel lifts because of a mismatch between product behavior and nail conditions — not just “bad prep.” The fix depends on where the lifting starts: cuticle lifting = adhesion or cuticle film issue; free-edge lifting = sealing or structural failure; full-plate lifting = cure or contamination problem. Scroll to the Quick Diagnosis Table to identify yours in 60 seconds.
This guide breaks down every type of builder gel lifting, gives you a one-table diagnosis system, exposes why the standard fixes fail, and walks you through a step-by-step application that actually holds. No filler. No generic advice.
The Real Root Cause
Every nail technician has heard the standard advice: prep better, dehydrate more, cap the edge. This advice is not wrong. But it is incomplete — because it treats all lifting as one single problem.
The real root cause of builder gel lifting is not a single mistake. It is a mismatch between the product’s mechanical behavior and the conditions on the nail plate. That mismatch can happen in at least four different ways:
Adhesion Failure
The gel never properly bonded to the nail plate surface — usually due to contamination, moisture, or oil at the interface.
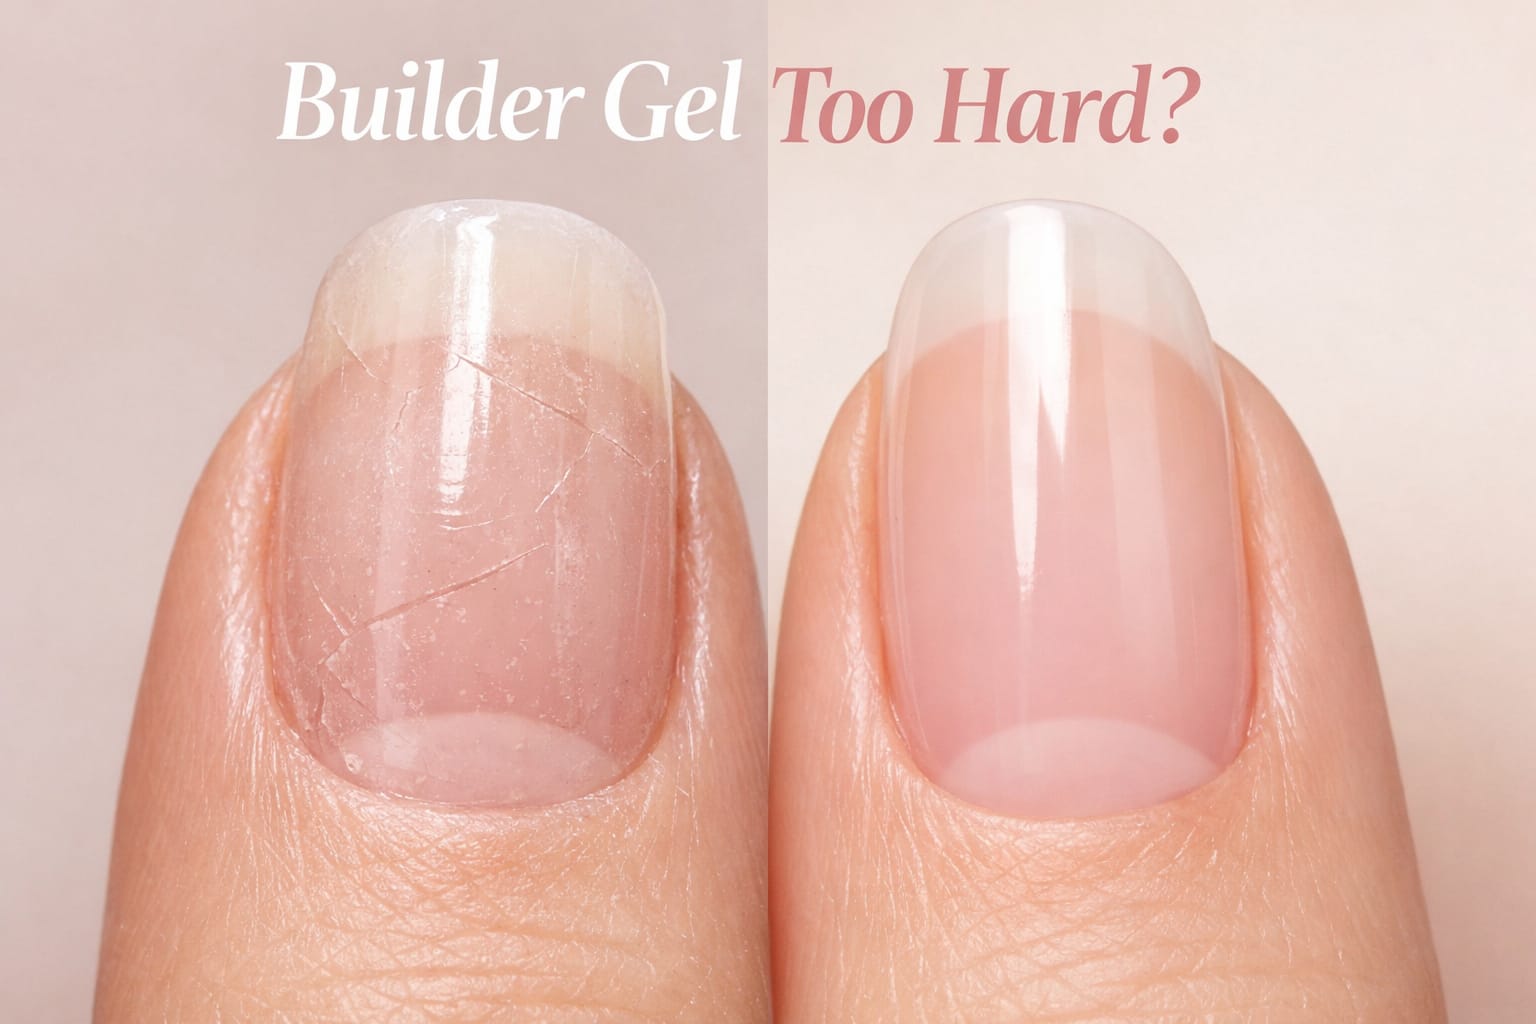
Structural Stress
The overlay is too rigid or too thick for the nail’s natural flexibility, causing the bond to crack under movement.
Cure Shrinkage
Under-cured gel contracts unevenly, pulling away from zone edges — especially at the cuticle and free edge tips.
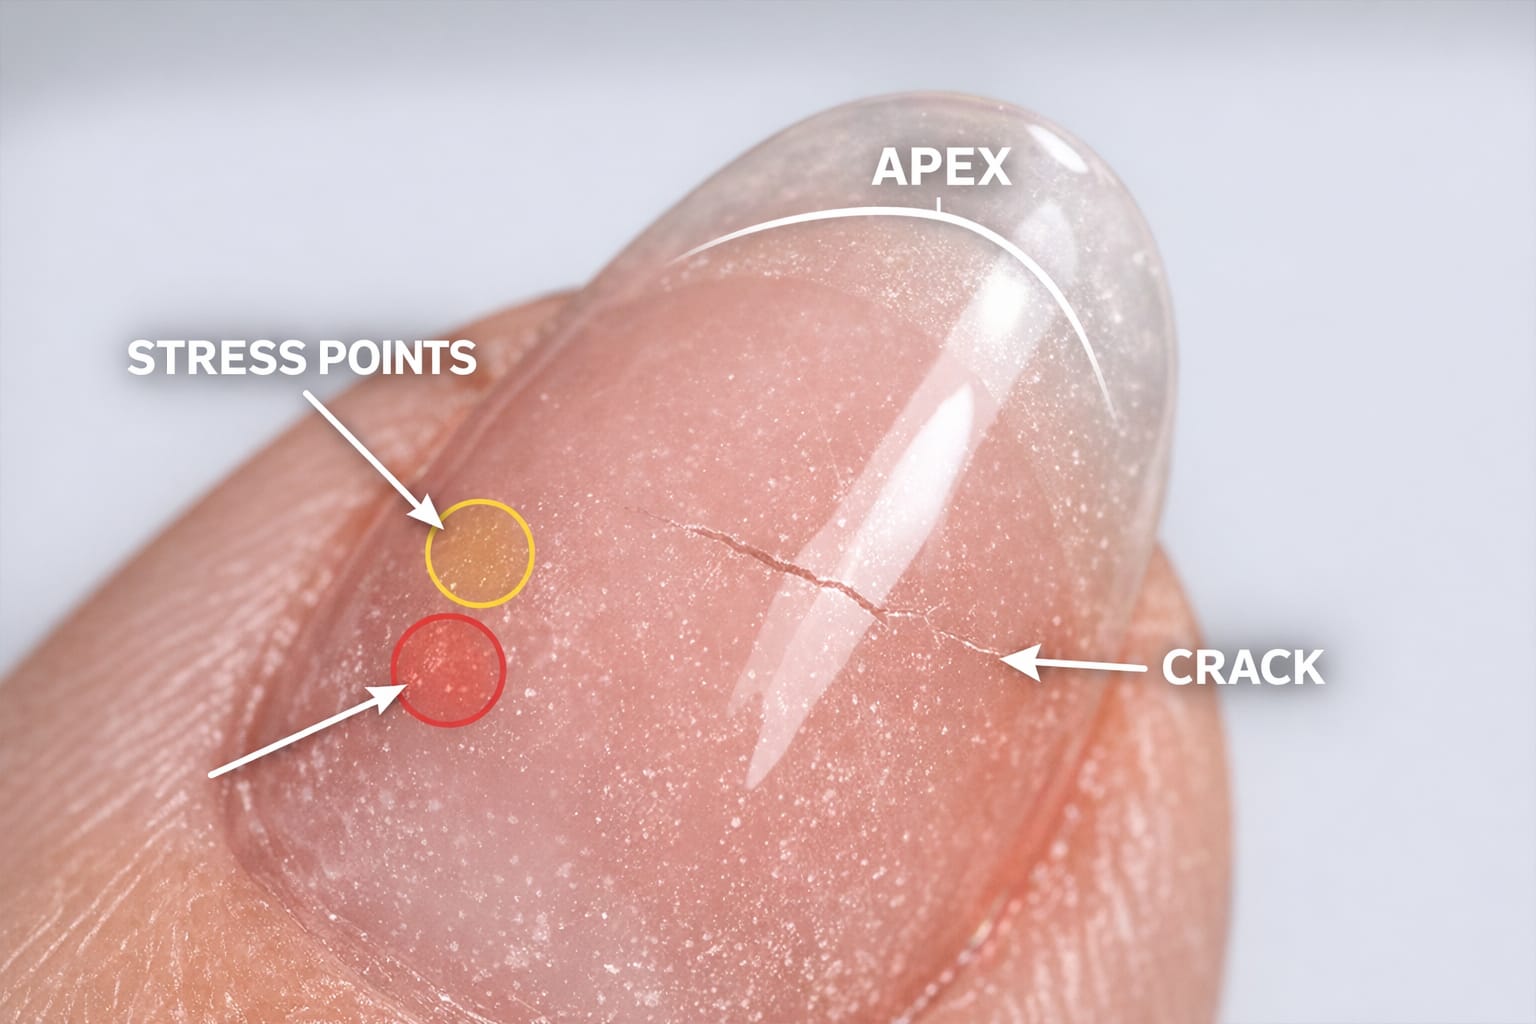
Structural Imbalance
The apex, arch, and thickness distribution don’t match the nail’s stress points — so force concentrates in the wrong zones.
Until you know which of these is happening on your nail, no amount of switching primers or brands will solve the problem. The fix has to match the failure.
Lifting Types

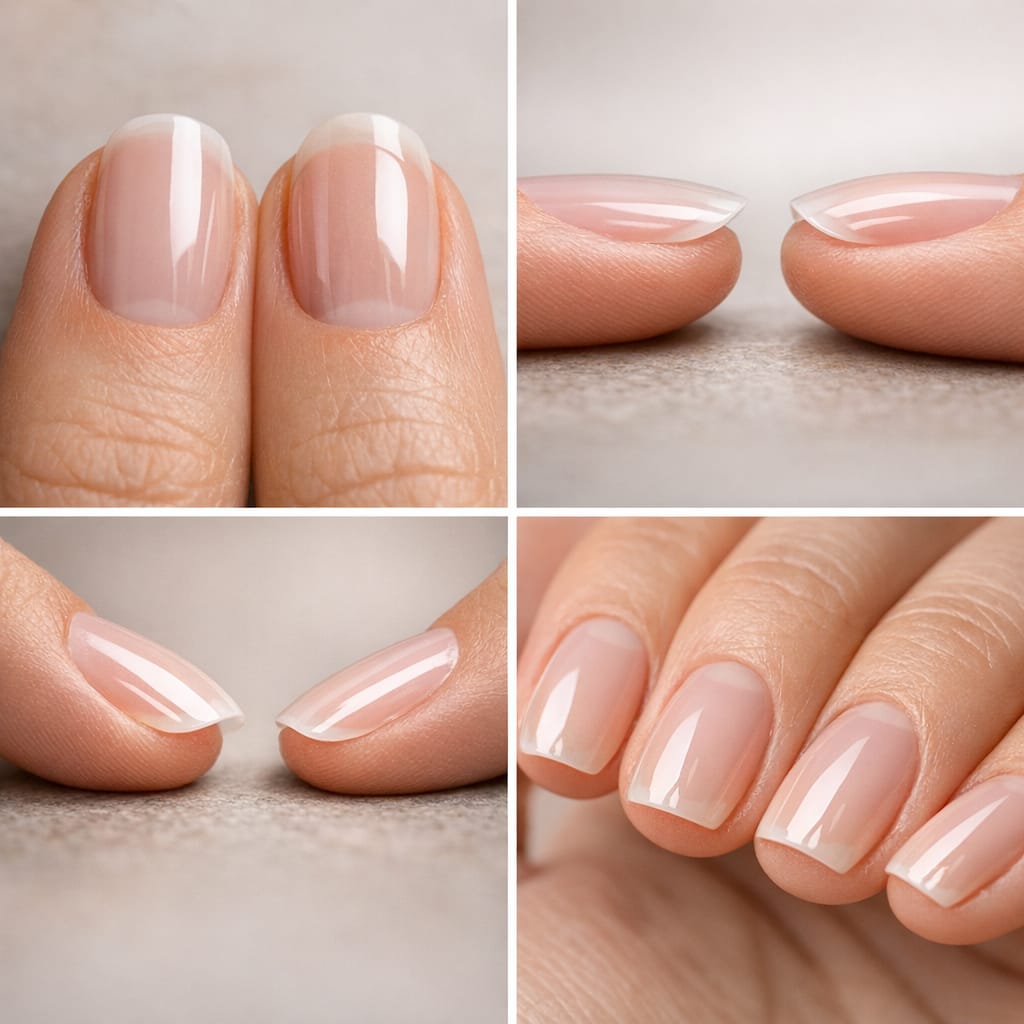
Before you can fix builder gel lifting, you need to identify exactly where it starts. Different locations point to different root causes. Here are the three primary lifting zones every nail tech should know:
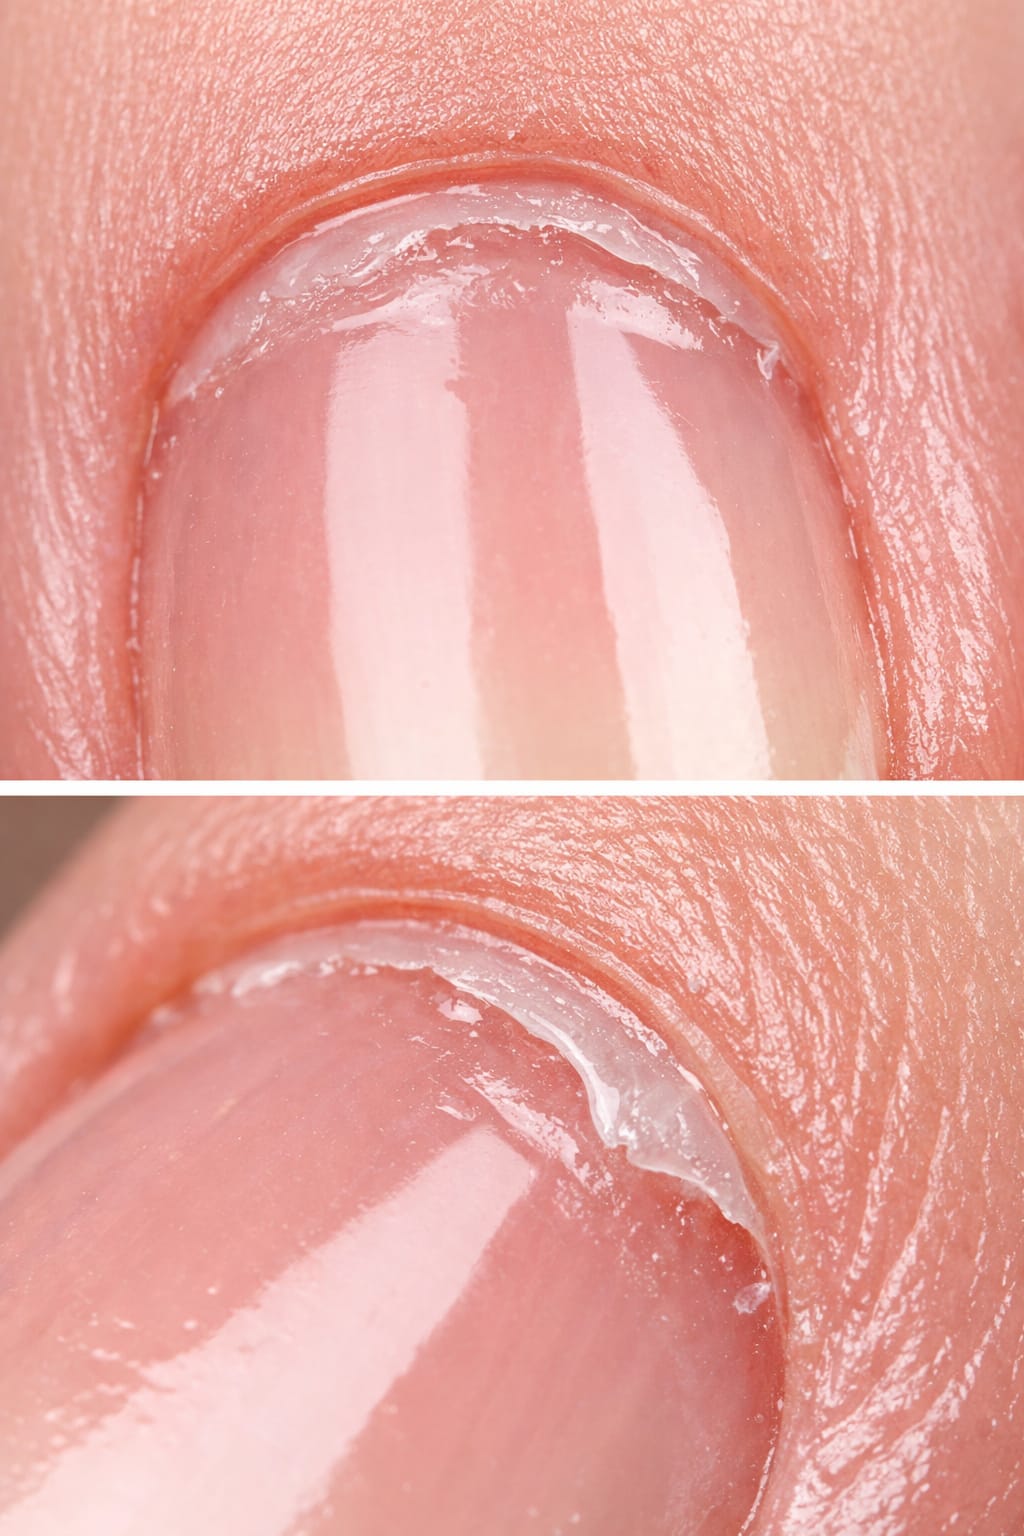
Type 1 — Cuticle-Area Lifting
This is the most common and most misunderstood type. It usually begins as a faint shadow or micro-separation near the base of the nail within the first 3–7 days. The cuticle zone is the most biologically active part of the nail plate — it’s thinner, more flexible, and has the highest oil migration rate. Even perfectly prepped nails can lift here if the product is applied too thick or placed incorrectly.
The most frequent causes include invisible cuticle film left on the nail, product touching the skin (even by 0.5mm), and over-filing that thins the plate near the base. For an in-depth breakdown of every cause, read our dedicated guide on why builder gel lifts at the cuticle area.
Type 2 — Free Edge Lifting
Lifting at the tip of the nail is a structural problem more than an adhesion problem. When the free edge is not properly sealed — meaning the gel does not wrap slightly under the tip — any mechanical force against the edge creates immediate leverage that pries the product off the nail plate.
This type is especially common in clients who work with their hands, type frequently, or have naturally short nail beds with longer free edges. The thinner and longer the free edge, the more flexion stress it experiences. Our detailed breakdown of why builder gel lifts at the free edge covers every scenario that causes tip separation.
Type 3 — Sidewall and Lateral Lifting
Lifting along the sides of the nail is almost always an application geometry issue. Product applied past the natural sidewall boundary or not properly pressed into the groove creates an edge that peels away under flexion. This type is more common on wide or flat nail plates where gel tends to pool sideways during application.

Quick Diagnosis Table
Use this table to identify your lifting pattern and trace it to its most likely cause. Find where the lifting starts, when it appears, and what symptom you’re seeing — then match it to the root cause column.
| Where It Starts | When It Appears | What You See | Most Likely Cause | Zone |
|---|---|---|---|---|
| Base of nail, near cuticle | Days 1–5 | Faint shadow or air pocket near the base | Cuticle film not removed / product touching skin | Cuticle |
| Base of nail, near cuticle | Days 7–14 | Lifting spreads as nail grows | Product too thick at base / no flexibility allowance | Cuticle |
| Tip of the nail | Days 1–3 | Tip chips or peels after impact | Free edge not sealed / capped under tip | Free Edge |
| Tip of the nail | Week 2–3 | Gradual tip separation with wear | Product too thin at stress area / apex too far forward | Free Edge |
| Both sides of the nail | Days 3–7 | Lifting along one or both sidewalls | Gel applied past sidewall groove / product touching skin | Sidewall |
| Entire nail plate | Day 1–2 | Whole overlay peels off in one piece | Severe oil contamination / no prep done properly | Full Plate |
| Entire nail plate | Week 2+ | Flexible overlay that slowly peels | Under-cured gel / wrong lamp / too thick in one layer | Full Plate |
| Cuticle + Free Edge simultaneously | Week 1–2 | Lifting at both ends, middle intact | Structural imbalance — apex not placed correctly | Multi-Zone |
Why Your Fixes Don’t Work
If you’ve already tried the standard solutions and the lifting keeps coming back, you’re not alone. The most common “fixes” in builder gel tutorials address surface symptoms, not structural causes. Here’s exactly why they fail:
Fix #1: Switching to a New Primer
Primer improves adhesion by modifying the surface chemistry of the nail plate. It works well when the primary issue is a weak adhesion interface. But primer cannot compensate for product touching skin, a cuticle film that hasn’t been removed, or structural flex stress. If your lifting is caused by geometry or mechanical stress — not surface adhesion — no primer change will fix it.
Fix #2: Filing Harder During Prep
This is one of the most common mistakes — and one of the most damaging. Aggressive filing does temporarily remove surface oil and shine, which improves adhesion in the short term. But it thins the nail plate. A thinner plate flexes more, and a product that can’t flex with it will detach faster, not slower.
If you’ve noticed that your sets last slightly better initially after heavy filing but still lift by week two — this is exactly what’s happening. Learn more about how common builder gel application mistakes like over-filing actually accelerate lifting over time.
Fix #3: Applying Thicker Product
It feels logical — if the product keeps lifting, surely a thicker application will hold better. In practice, the opposite is true. A very thick application cures unevenly. The surface cures first under the UV/LED lamp, while the deeper layers remain soft and contractile. As the inner layers cure, they shrink slightly, pulling away from the nail plate beneath — especially at zone edges.
The correct approach is building thickness in multiple thinner layers, allowing full cure between each application. This creates a more stable, internally consistent structure with even contraction through the full depth.
Fix #4: Changing Gel Brands
Gel brand matters less than technique. Two technicians using the same product can get completely different wear times based on application habits alone. If your core technique has structural errors — incorrect apex placement, product touching skin, insufficient free-edge sealing — you’ll experience the same lifting with every brand.
That said, brand compatibility with your lamp is a real issue. Always verify that your gel brand is tested and optimized for your specific lamp’s UV/LED wavelength and wattage. Mismatched systems cause under-curing regardless of technique.
Fix #5: Skipping the Base Layer
Some tutorials show fast one-step builder gel applications with no separate base coat or bond layer. This works in demonstration conditions — controlled environment, ideal nails, experienced hands — but fails in real-world application. Builder gel applied directly to the natural nail plate without a bonding layer has a much higher failure rate, especially on clients with naturally oily nail beds.
The Non-Negotiable Prep Checklist
Perfect prep is the foundation of a lifting-free set. But “prep” doesn’t mean “file and dehydrate.” It means removing every possible contamination vector from the nail surface before product touches it. Every step below must be completed on every nail, on every client, every time.
- Remove all old product completely — any remaining residue acts as a contaminated adhesion layer.
- Push back the cuticle using a metal pusher or orangewood stick — this reveals the true nail plate boundary.
- Remove the cuticle film (pterygium) with a dry cuticle remover and gentle scraping — this invisible membrane is the #1 cause of cuticle lifting.
- Lightly buff the surface with a 180–240 grit file — remove shine only, no pressure needed.
- Dust the nail completely — any filing dust left on the surface creates a physical barrier under the product.
- Apply dehydrator and allow full evaporation — do not skip the wait time; wet dehydrator traps moisture.
- Apply bond/primer to the nail plate only — never onto the skin or cuticle area.
- Do not touch the nail plate after prep — skin contact transfers oil instantly and invalidates the entire step.
Step-by-Step Application for a Lifting-Free Set
Once prep is complete, the application process itself must be structured correctly. The following steps reflect the correct sequence for a builder gel overlay applied to natural nails — optimized to prevent lifting at every zone.
-
Apply a Thin Bond Layer
Apply a thin, even bond coat to the entire nail plate. Keep it 0.5mm away from all skin edges. Cure for 60 seconds in a 48W LED lamp. Do not wipe the inhibition layer — some bond layers are designed to remain slightly tacky for adhesion.
-
Apply the First Thin Builder Gel Layer
Apply a thin first layer of builder gel, focusing on even coverage across the full nail plate. This is not the structural layer — it is the adhesion layer. Keep it thin. Press slightly into the cuticle area without flooding the skin. Cure for 60 seconds.
-
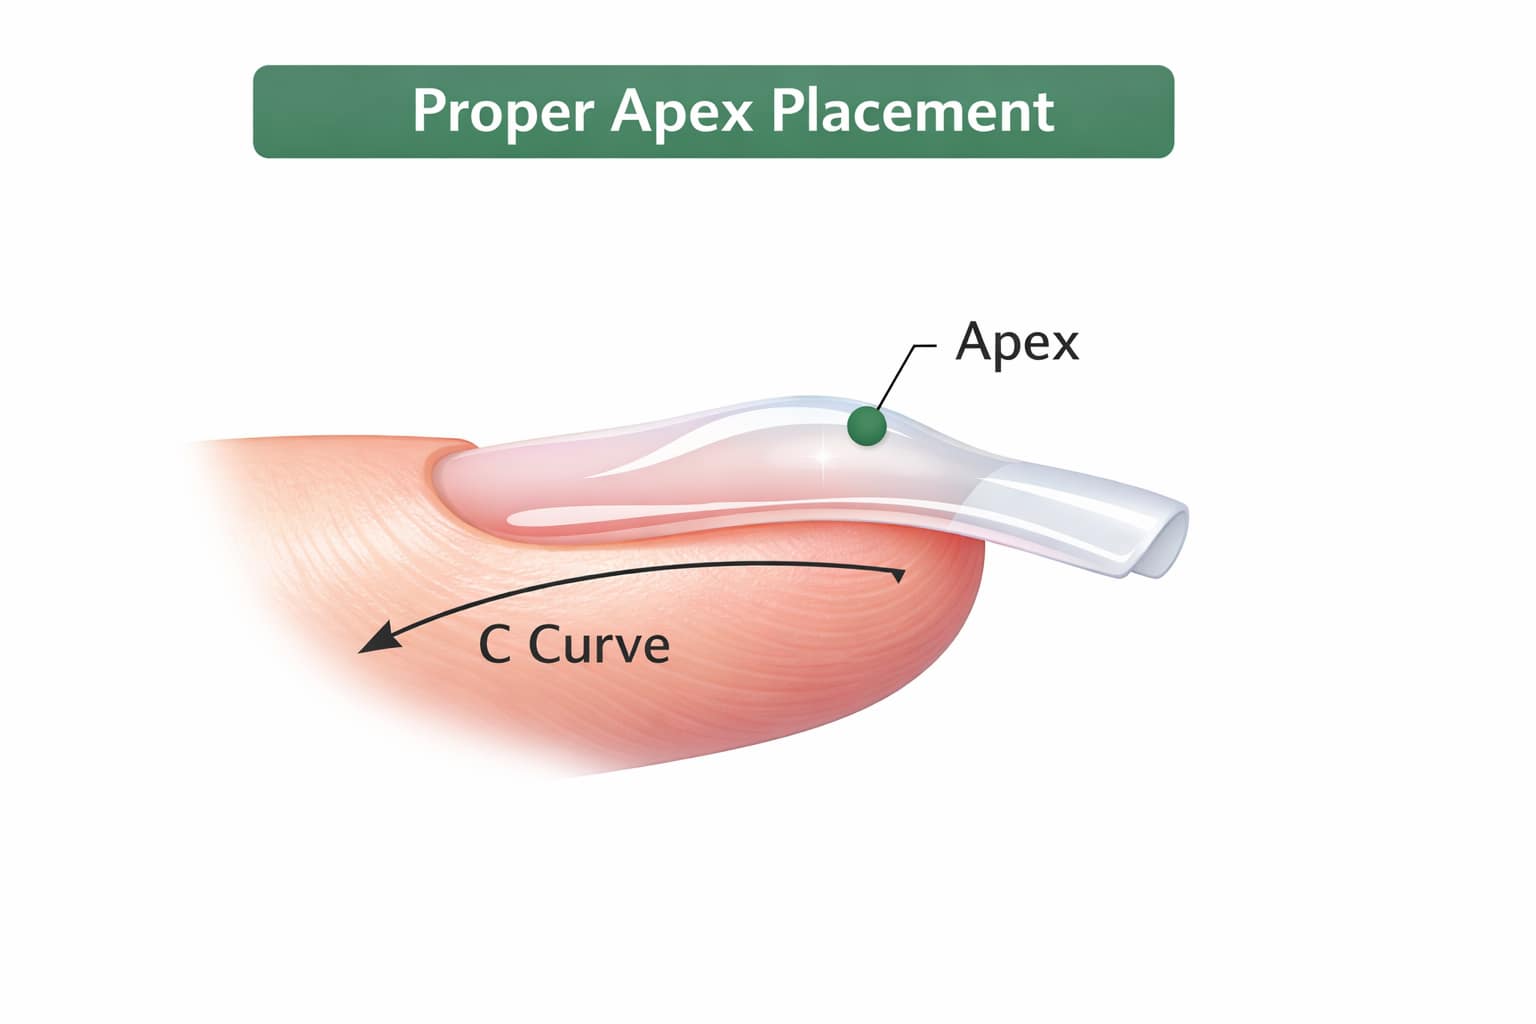
Build the Apex on the Second Layer
Apply the second layer with more product, building the apex — the thickest point — at approximately one third of the way from the cuticle toward the free edge. This is the structural layer. The apex distributes flex stress away from the cuticle and free edge. Cure fully.
-
Seal and Cap the Free Edge
On the final layer, extend the product very slightly past the tip of the nail and wrap it gently underneath. This creates a sealed cap on the free edge that resists chipping and tip separation. This is the single most important step for preventing free-edge lifting.
-
Final Cure — Full Time, No Shortcuts
Cure the final layer for the full recommended time. Do not reduce cure time to avoid heat spikes — instead, use a lower-wattage lamp or pause the cure halfway. An under-cured final layer is soft, contracts unevenly, and is the primary cause of whole-nail lifting within the first week.
-
Check All Edges Before Finishing
Before filing and finishing, visually inspect all zone edges — cuticle, sidewalls, and free edge tip. Any rough or raised edge is a future lifting point. File smooth before top coat. Never leave a rough free edge — it acts as a mechanical catch point that encourages peeling.


Application Mistakes That Cause Lifting
Even with correct prep and the right products, application errors are responsible for a large proportion of lifting failures. The following mistakes are the most frequently identified causes across all lifting types. Many techs and clients make these without realizing — because the consequences don’t appear until days later.
A comprehensive breakdown of every mistake and how each one creates a specific failure pattern is available in our full guide on builder gel application mistakes. Below are the most critical ones to eliminate immediately:
- Flooding the cuticle — product that touches skin always lifts, without exception
- Applying product to a nail plate that was touched after prep
- Using a flash-cure to hold product in place (this creates an incomplete internal bond)
- Building the apex too far forward (near the free edge instead of zone 1–2 boundary)
- Applying builder gel in one thick layer instead of two to three thinner ones
- Not capping the free edge tip on the final layer
- Filing into the sidewall groove during finishing, which removes the sealed edge
- Using a top coat that is not compatible with the builder gel system used
Client Habits That Undo Perfect Application

Even a flawlessly applied set can lift prematurely if the client’s habits create conditions the product cannot withstand. This is not the client’s fault — most clients don’t know these behaviors cause damage. Education is part of every professional service.
- No picking or peeling — the moment a client picks at any loose edge, they remove layers of natural nail plate with the gel.
- Wear gloves for wet work — prolonged water exposure softens the adhesion layer and accelerates lifting, especially at the cuticle.
- Apply cuticle oil daily — well-hydrated nails are more flexible and reduce stress-related lifting. Oil does not cause lifting when applied to the skin, not the nail plate.
- Avoid using nails as tools — opening cans, peeling stickers, and similar leverage actions apply direct stress to the free edge and are a primary cause of tip lifting.
- Do not use acetone on intact sets — spot-cleaning with acetone weakens the overlay edges and creates micro-gaps.
- Return within 3–4 weeks for infill — natural nail growth increases free-edge leverage over time. Extended wear without infill dramatically increases lifting risk.
Lamp Compatibility and Cure Quality
Under-cured builder gel is a major and frequently overlooked cause of lifting that appears to be an adhesion failure but is actually a cure failure. The product feels firm but behaves as if it’s slightly flexible — contracting gradually over days and pulling away from zone edges.
The two most common causes of under-curing in professional settings are lamp-product mismatch and incorrect layer thickness.
Lamp-Product Mismatch
Not all UV/LED lamps cure all gels equally. Builder gels contain photoinitiators that are activated at specific wavelengths. If your lamp’s output spectrum doesn’t overlap well with your gel’s photoinitiator absorption curve, the gel will cure slower and less completely — regardless of how long you leave it under the lamp.
Layer Thickness and Cure Penetration
UV and LED light penetrates gel from the surface downward. A layer that is too thick will have its surface cured while the base remains soft. This creates a product with uneven internal structure — firm outside, contractile inside — that pulls away from the nail plate as the deeper layers complete their cure over the following 24–48 hours. This is why some clients report that their set “felt fine” on day one but started showing lifting by day three.
Final Pre-Finish Inspection Checklist
Before you apply top coat and consider the service complete, run through this checklist on every nail. Each item here corresponds to a real lifting risk that can still be caught and corrected at this stage.
- Cuticle zone is clean — no product touching skin, clean hairline gap visible at the base.
- Free edge is sealed — product wraps slightly under the tip with no open edge visible from below.
- Sidewalls are within the natural groove — no product overflow onto lateral skin.
- Apex is visible and correctly placed — thickest point is in zone 1–2, creating a smooth arch when viewed from the side.
- Surface is uniformly firm — no soft spots or areas of flex in the cured overlay.
- All edges are smooth — no rough spots or micro-ridges at any zone boundary.
- No bubbles or cloudiness in the product — these indicate air entrapment or contamination during application.
Builder gel lifting is a solvable problem — but only when you know which type of lifting you’re dealing with and target the actual cause. Use the diagnosis table above to find your pattern, then apply the matching fix. If you want to go deeper on specific zones, read our full guides on cuticle-area lifting, free-edge lifting, and the most common application mistakes that cause both.