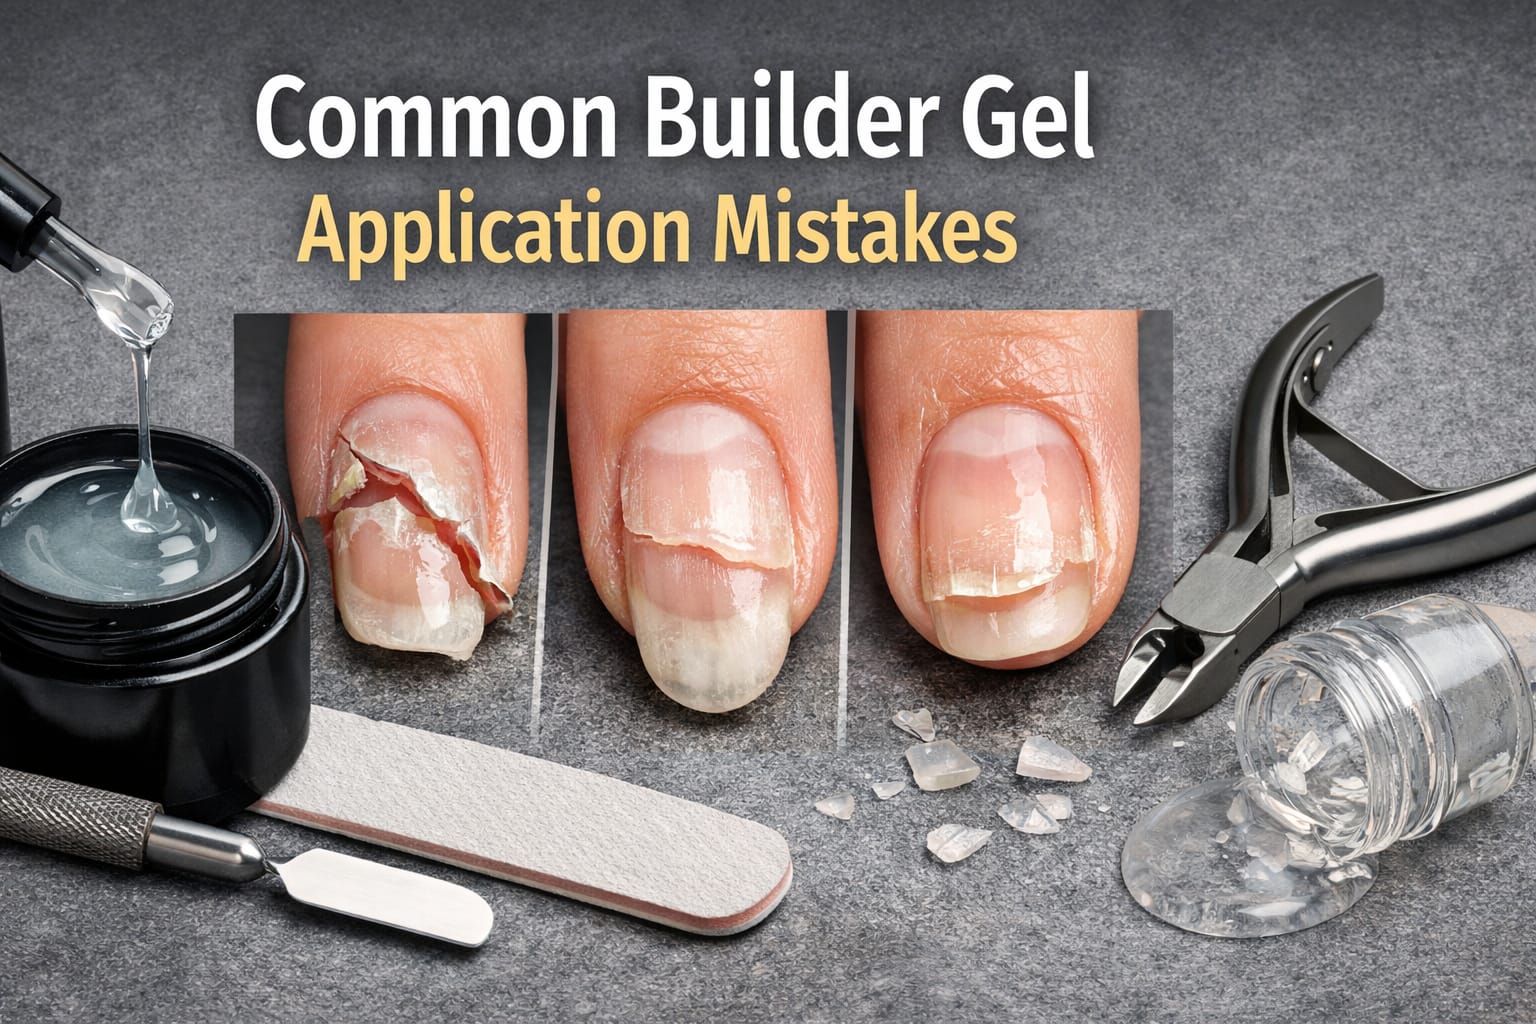
7 Builder Gel Application Mistakes That Cause Lifting and Breakage

Introduction
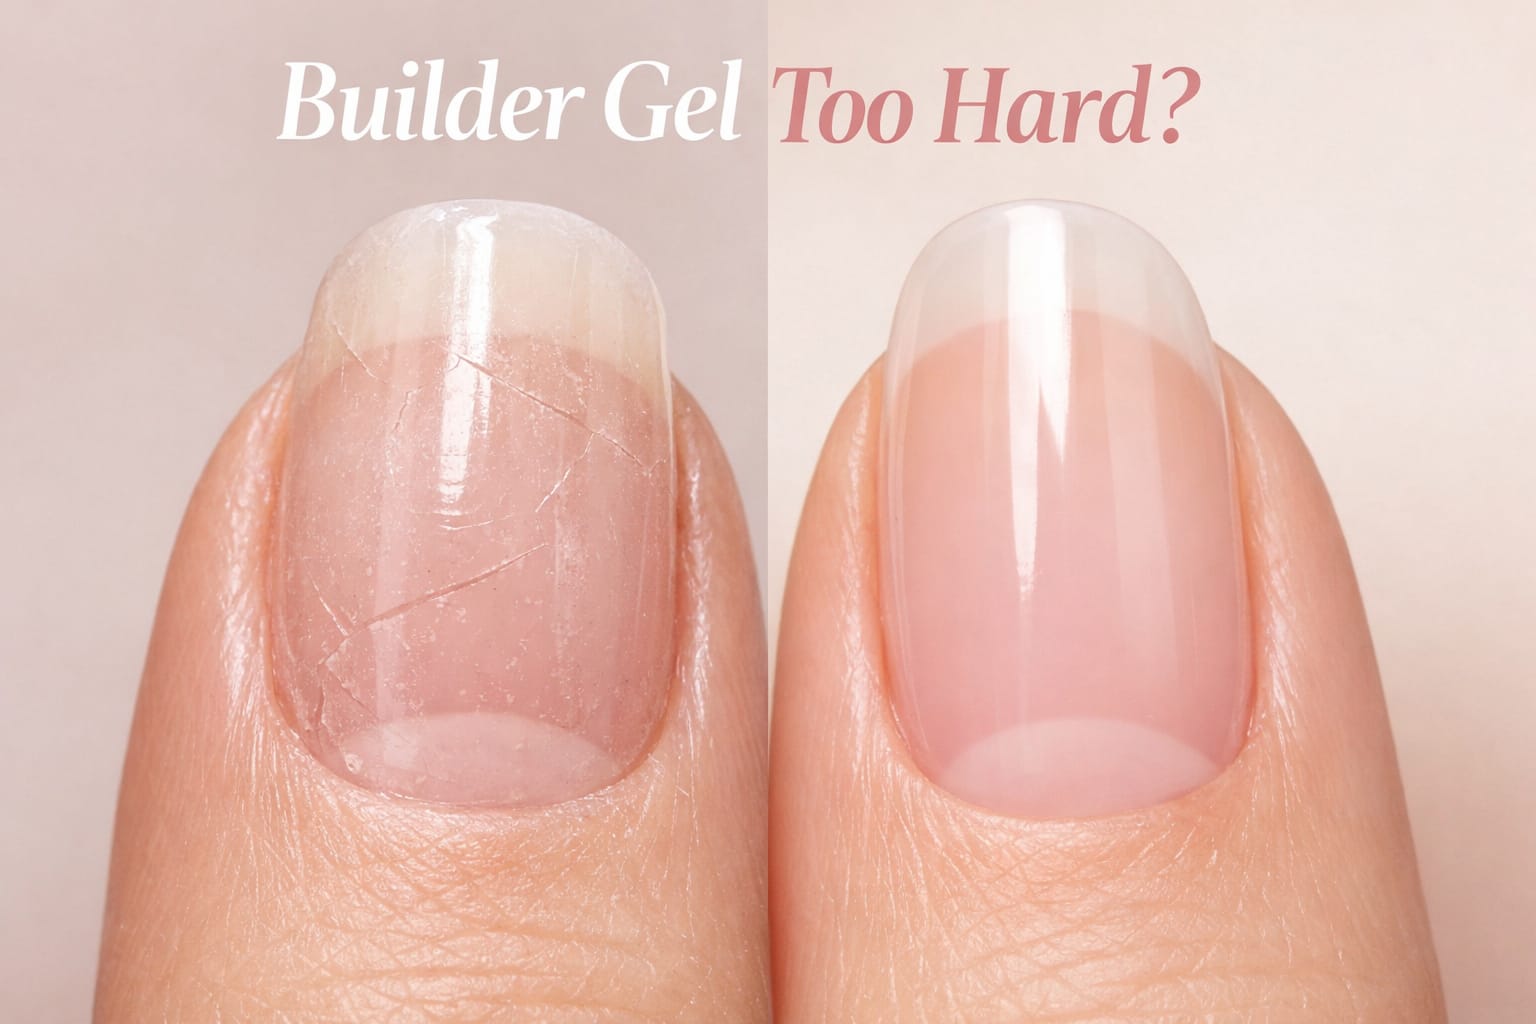
Builder gel is often recommended as a solution for weak, flexible, or easily lifting nails. When applied correctly, it can dramatically improve durability and wear time. However, many recurring issues blamed on “product quality” are actually the result of application mistakes rather than the builder gel itself.
What makes builder gel challenging is that it behaves differently from regular gel polish or rubber base. It requires a structural mindset rather than a purely aesthetic one. Understanding the most common application mistakes—and why they cause problems—is key to getting consistent, long-lasting results.
Mistake #1: Treating Builder Gel Like Regular Gel Polish
One of the most frequent mistakes is applying builder gel the same way gel polish is applied.
Builder gel is not just a thicker color coat. Its primary role is structural. When it’s brushed on thinly and evenly like polish, it fails to provide reinforcement where the nail actually needs support.
Why this causes problems
Natural nails bend most at the stress point. A flat, uniform layer of builder gel does very little to counteract that movement. Over time, repeated flexing leads to micro-separation, lifting, or cracking.
How to avoid it
Builder gel should be strategically placed, not evenly spread. Slightly more product is needed at the stress point to create balance and resistance against bending forces.
Mistake #2: Ignoring the Natural Nail Shape
Not all nails are the same. Flat nails, curved nails, downward-growing nails, and uneven nail plates all respond differently to builder gel.
Applying the same structure to every nail assumes that all nails behave the same way—which they don’t.
Why this causes problems
A structure that works on a naturally strong nail may fail completely on a flexible or uneven one. When the builder gel doesn’t align with the nail’s natural architecture, pressure is distributed unevenly, leading to weak points.
How to avoid it
Before application, observe:
- Where the nail bends most
- Whether the nail plate is flat or curved
- How the free edge reacts under pressure
Builder gel placement should be adjusted accordingly rather than copied from one nail to the next.
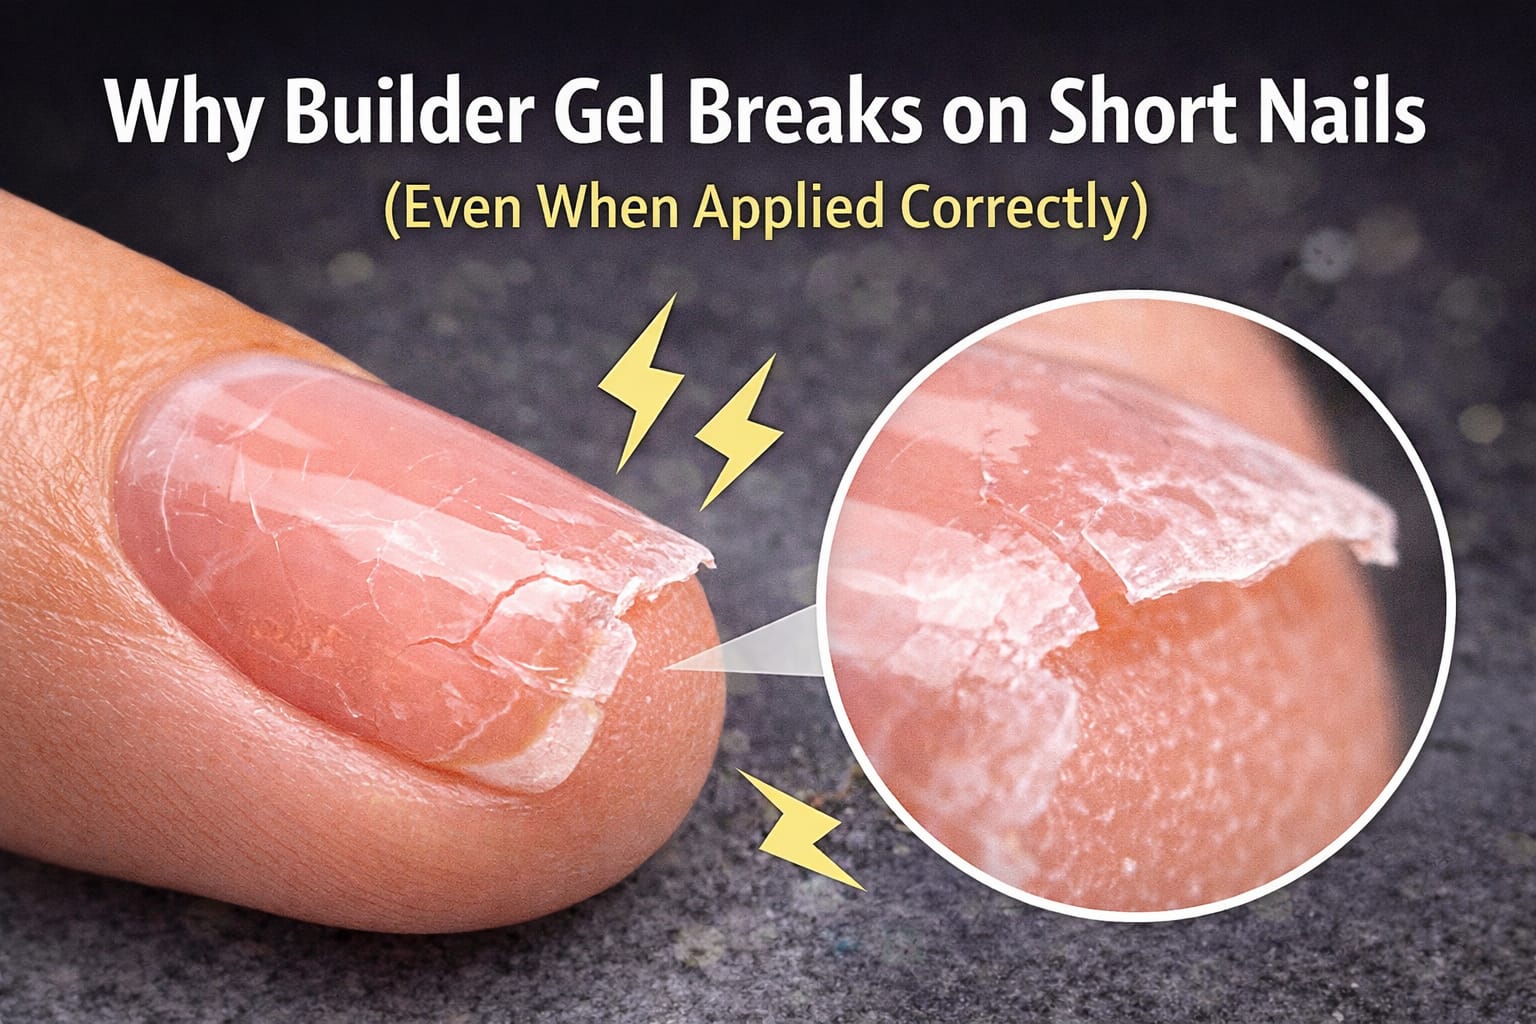
Mistake #3: Over-Filing the Nail Plate
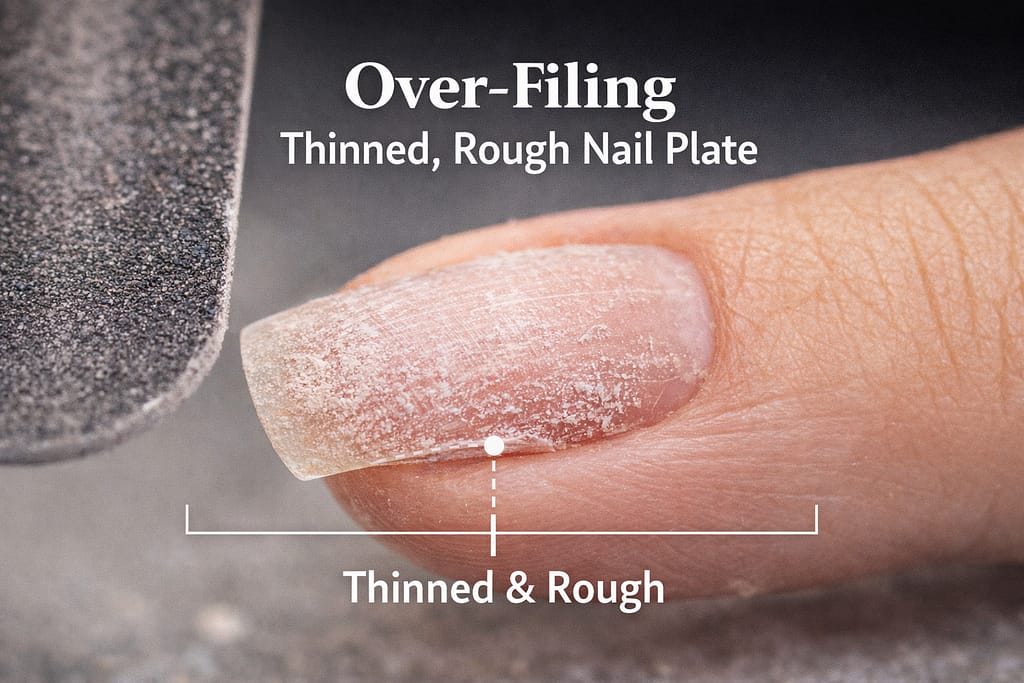
Aggressive prep is often mistaken for thorough prep.
While proper surface preparation is essential, over-filing weakens the nail plate and reduces its ability to support any system—builder gel included.
Why this causes problems
A thinned nail plate flexes more than a healthy one. Even a well-built structure will struggle to stay intact if the foundation underneath is compromised.
Over-filing can also cause sensitivity, dehydration, and uneven adhesion.
How to avoid it
Prep should focus on:
- Removing surface shine
- Cleaning cuticle residue
- Creating a uniform surface
The goal is balance, not abrasion.
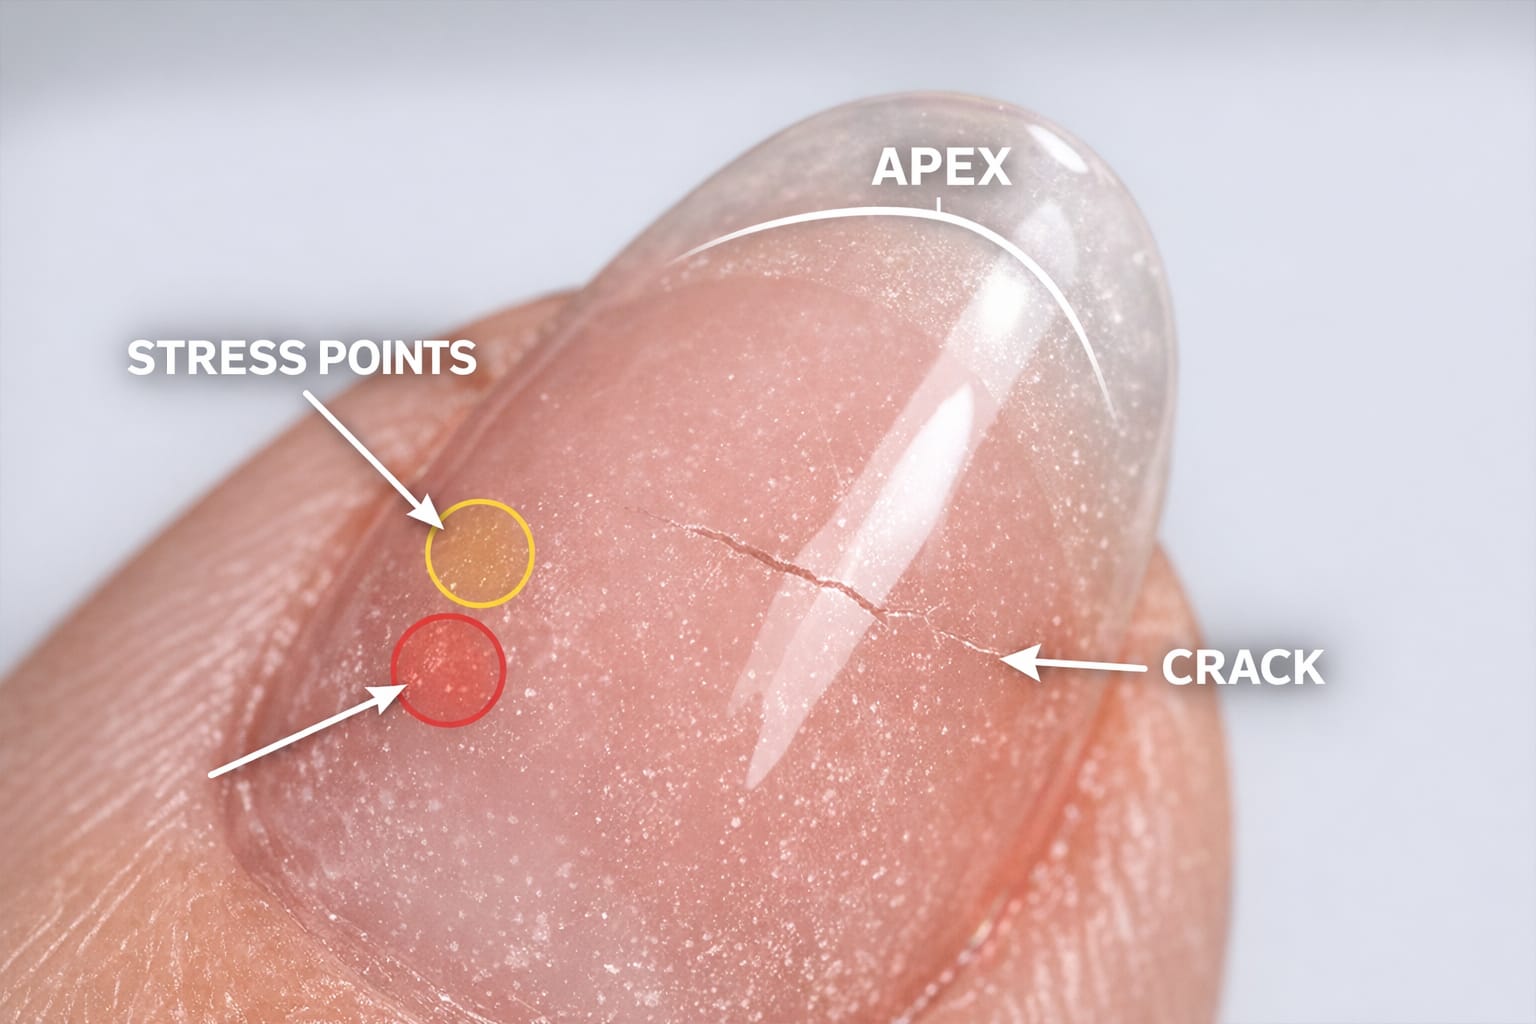
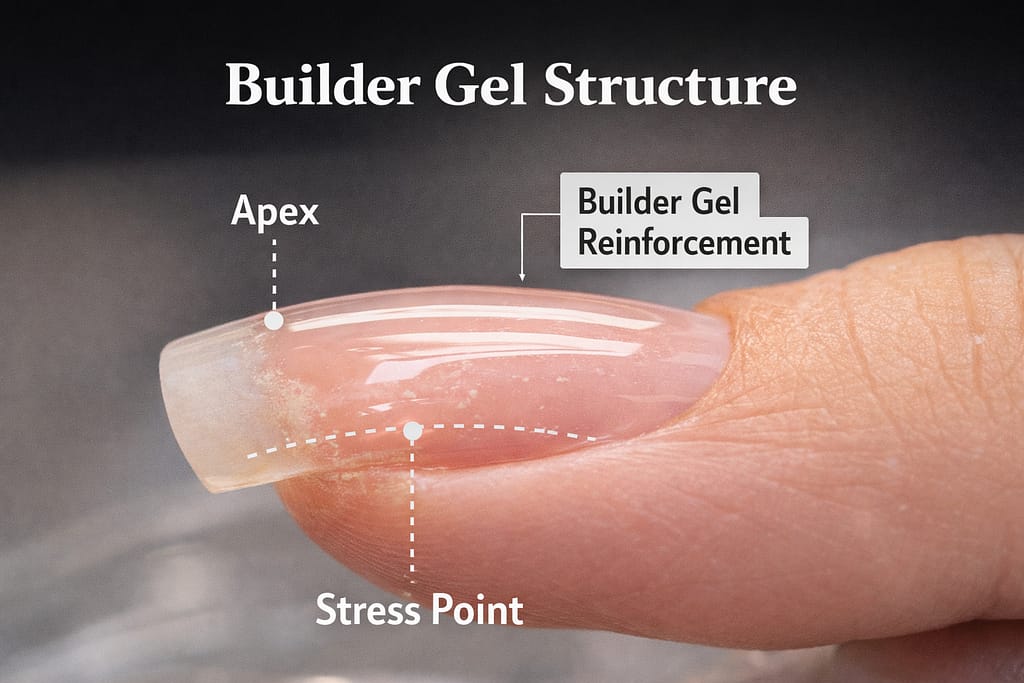
Mistake #4: Placing the Apex Incorrectly
The apex plays a crucial role in builder gel performance, yet it’s often misunderstood.
An apex placed too far back, too far forward, or not built enough provides little structural benefit.
Why this causes problems
When the apex doesn’t align with the stress point, the nail bends where it’s weakest. This can cause lifting at the cuticle, cracks at the free edge, or overall instability.
How to avoid it
The apex should support the area where the nail naturally bends under pressure. This position varies slightly depending on nail length and shape, which is why copying exact placement from tutorials doesn’t always work.
Mistake #5: Using Builder Gel on Nails That Don’t Need It
Builder gel is powerful, but it’s not always necessary.
Applying it to nails that are already strong or rigid can create unnecessary bulk and increase rigidity beyond what the nail can tolerate.
Why this causes problems
Over-structuring can make nails feel stiff and uncomfortable. In some cases, it can even increase the likelihood of cracking rather than preventing it.
How to avoid it
Builder gel works best when there is a clear need for reinforcement. For nails that only require better adhesion or flexibility, other systems may be more appropriate.
Choosing the right system matters just as much as applying it correctly.
Mistake #6: Incorrect Curing Between Layers
Rushing through curing steps or under-curing builder gel layers is another common issue.
Builder gel is denser than standard gel polish and often requires slightly more attention during curing.
Why this causes problems
Incomplete curing weakens the internal structure of the gel. This can lead to:
- Soft spots
- Early lifting
- Reduced durability
Even if the surface feels dry, the underlying layers may not be fully set.
How to avoid it
Follow the manufacturer’s curing guidelines carefully and ensure that layers are not applied too thickly in a single pass.
Mistake #7: Expecting Builder Gel to Fix Everything

Builder gel is not a universal solution.
It cannot compensate for:
- Poor prep
- Mismatched systems
- Improper removal techniques
- Repeated mechanical stress
Why this causes problems
When expectations don’t match reality, recurring issues are often blamed on the product rather than the process.
How to avoid it
Builder gel should be part of a broader system that considers nail behavior, lifestyle factors, and maintenance habits.
Final Thoughts
Builder gel performs best when it’s applied with intention rather than routine. Most application issues stem from treating it as a cosmetic layer instead of a structural one.
Understanding nail behavior, stress points, and system compatibility makes builder gel far more effective—and far less frustrating.
In our previous articles, we explored how different gel systems compare and why lifting occurs. When those principles are applied correctly, builder gel becomes a reliable tool rather than a temporary fix.